Tag Archives: marine paint stripper

Preparing Your Boat’s Paint for Winter

If you live in one of the northern states of the U.S. your boating season will come to a close eventually, and that means getting your boat ready for winter. If you want your boat to stay in good shape, you’ve got some work ahead. Don’t worry, we’ve compiled a solid checklist to keep your boat’s paint intact through the cold months, so when you’re ready to hit the water next season, so is your boat. Let’s get to it and make sure your paint job survives the winter chill!

Clean the Hull Thoroughly

Before storing your boat, remove any dirt, algae, or barnacles from the hull. A clean surface ensures that any existing antifouling paint remains effective and that you can inspect for damage more easily. Use a pressure washer or soft brush with mild cleaners suitable for your paint type.

Inspect for Paint Damage

Once clean, inspect the hull for any signs of paint wear or damage. Look for cracks, chips, or peeling areas, especially along the waterline. If you notice severe wear, mark these areas for touch-up or repainting when temperatures are suitable.
 

Repair Minor Paint Damage

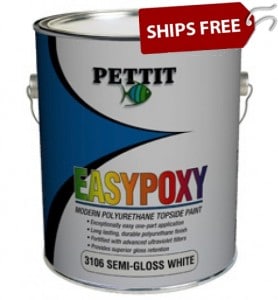
If you spot minor chips or scratches, use touch-up paint to fix them. Pettit Paint offers small-scale repair solutions, such as their topcoat and primer products, which are ideal for such jobs. Ensure you follow manufacturer instructions for temperature and humidity during application.

Apply a New Coat if Necessary

If your boat’s antifouling paint has seen better days, consider applying a fresh coat before winter. Pettit’s water-based antifouling paints offer excellent protection and can be applied in cooler temperatures. Make sure to check the weather conditions and follow the specific drying times.

Use a Primer for Extra Protection

For boats that will be stored on trailers or cradles, applying a protective primer like Pettit’s Protect High Build Epoxy Primer can prevent moisture from penetrating the hull and causing blisters. This layer adds an extra barrier against winter’s harsh conditions.

Winterize the Hull

For boats stored in water, consider applying a protective wax or non-stick coating to prevent marine growth from attaching during the offseason. Pettit’s specialty products, like Prop Coat Barnacle Barrier, are perfect for safeguarding your boat’s underside.

Check Weather Exposure

If your boat is stored outside, ensure it is properly covered and sheltered from the elements. Direct exposure to snow, ice, and freezing rain can damage the paint. A good-quality cover, combined with proper ventilation, will help maintain your boat’s finish during winter.

Spring Inspection

Before launching your boat in the spring, inspect the hull again to ensure the paint held up over the winter. Touch up any areas that may have been compromised and perform a light cleaning to remove dust or debris.

Your boat is a prized asset, so you need to protect your boat’s paint from winter damage and ensure it’s ready for the next boating season. Regular maintenance is key to extending the life of both your boat and its paint. Regular maintenance isn’t just smart—it’s essential if you want your boat looking good and running smooth year after year. Need more tips or the best marine paints to get the job done? You can count on our expert advice and high-quality marine paints, just contact the customer support team at Bottom Paint Store. 

Choosing and Using Marine Paint Strippers for Safe and Effective Application

Marine paint strippers are essential for removing old, damaged, or unwanted paint from boats and marine structures. They help maintain the vessel’s integrity and appearance, ensuring a smooth surface for new paint and protecting against further wear. Choosing the right paint stripper is crucial for achieving effective results while ensuring safety and compatibility with the surface.

Types of Marine Paint Strippers

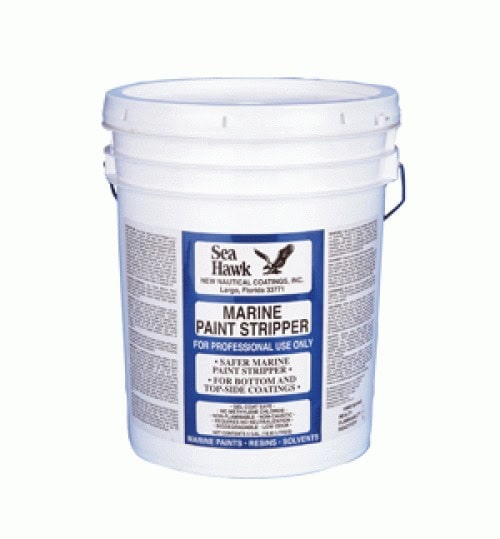
Marine paint strippers come in various formulations. Solvent-based strippers are powerful and effective for tackling multiple layers of paint, particularly on metal surfaces, though they can be harsh and require careful handling. Gel-based strippers have a thicker consistency, making them suitable for vertical surfaces and detailed areas. They stay in place longer, allowing for more controlled application. For those concerned about environmental impact, eco-friendly options are available. These strippers use less aggressive chemicals and are designed to be safer for marine life and ecosystems. Sea Hawk Marine Paint Stripper is a notable example, providing a balance between effectiveness and user safety.

Key Considerations for Choosing the Right Marine Paint Stripper

When selecting a marine paint stripper, several factors should be considered. Surface compatibility is essential, as different strippers are suited for metal, fiberglass, or wood surfaces. Safety is also a significant concern; opting for environmentally friendly products can minimize health risks. Effectiveness is important, so choose a stripper proven to work on marine-grade paints. Additionally, ease of application and clean-up should be considered, as some products require specialized tools or techniques. The drying or setting time of the stripper is another factor, as different products have varying timelines for effectiveness.

Step-by-Step Guide to Safely Apply Marine Paint Strippers

Begin by preparing the surface, ensuring it is clean and dry before applying the stripper. Gather the necessary tools, including brushes, scrapers, and safety gear like gloves, goggles, and masks. Apply the stripper evenly across the surface using a brush, following the manufacturer’s instructions for optimal results. Allow the stripper to work as directed, typically waiting until the paint begins to bubble or lift. Once the paint is softened, gently scrape it off, taking care to avoid aggressive scraping that could damage the underlying surface.

Safety Precautions When Using Marine Paint Strippers

Safety is paramount when using marine paint strippers. Always wear protective gear, including gloves, goggles, and masks, to shield yourself from harmful fumes and chemicals. Work in a well-ventilated area or outdoors to avoid inhaling toxic fumes. Proper disposal of paint and stripper residue should follow local regulations to minimize environmental impact.

Eco-Friendly and Biodegradable Options

For those who prioritize environmental considerations, eco-friendly marine paint strippers are available. These products comply with environmental regulations and are designed to be less harmful to marine ecosystems. Look for biodegradable options that help reduce the ecological footprint of your maintenance projects.

This environmentally safe formula is biodegradable, non-flammable, low odor, and has no methylene chloride or other harsh solvents.

Common Mistakes to Avoid When Using Marine Paint Strippers

Several common errors can impact the effectiveness of paint strippers. Using too much or too little product can lead to wasted materials or inadequate paint removal. Scraping too aggressively can damage the surface, so gentle scraping is recommended. Always follow the manufacturer’s instructions to avoid problems and ensure the best results.

Maintenance Tips After Stripping Paint

After removing old paint, it is important to prepare the surface for new paint by thoroughly cleaning it to remove any residue. Ensure the surface is completely dry before applying new paint. Properly store tools and maintain them for future use to ensure they remain in good condition.

How to Apply Bottom Paint Over Existing Bottom Paint

Bottom Painting is not very technical, but you must have a clean surface to insure good adhesion.

Refer to the Sea Hawk Compatibility Chart to determine if your existing coating is compatible with Sea Hawk antifoulant paint choice. To insure that your bottom paint adheres to your existing coating, it is important to have a clean prepared surface and an existing coating that is in good condition.

Known Compatibility of Existing Bottom Paint:
Power wash (pressure wash) to remove any loose paint, dirt, grease, or any other surface contaminants.
Scuff sand with 80 grit sandpaper, or scuff with a 3M Scotch-Brite® 7447 pad scrubbing thoroughly. Remove all residue and let dry.
Apply minimum of two coats of antifoulant. Allow 3 to 6 hours between coats and a minimum overnight dry. See the specific Technical Data Sheet for antifoulant being used. Some antifoulants may require more than 2 coats.

Unknown Compatibility* of Existing Antifoulant:
Power wash (pressure wash) to remove any loose paint, dirt, grease, or any other surface contaminants.
Scuff sand with 80 grit sandpaper, or scuff with a 3M Scotch-Brite® 7447 pad scrubbing thoroughly. Remove all residue and let dry.
Apply 1 coat of Bottom Paint PrimersHAWKocon or 1283 Island Primer (see respective technical data sheet)
Apply minimum of two coats of antifoulant. Allow 3 to 6 hours between coats and a minimum overnight dry. See the specific Technical Data Sheet for antifoulant being used. Some antifoulants may require more than 2 coats.

Poor Condition of Existing Antifoulant:
If previous coating is cracking, flaking or peeling then strip antifoulant with Marine Paint Stripper, or by sanding or commercial blast. Refer to Bare Fiberglass Application Guidelines for new antifoulant application.