Tag Archives: gelcoat

Changing the Color of Your Boat’s Gelcoat

When changing the color of your boat’s gelcoat, using pigment agents effectively is crucial to achieving the desired shade. 

Here’s how you can use these agents to customize your boat’s appearance:

Choose the Right Pigment Agents: Select pigment agents that are specifically formulated for use with gelcoat. These pigments are designed to blend seamlessly and maintain the durability and UV resistance of the gelcoat. For a variety of pigment options and specific products, check out our Pigments For Gel Coats And Resins 

Test Color Mixes:

Before applying the pigment to the entire boat, it’s wise to test the color mixture on a small scale. Mix a small amount of gelcoat with your chosen pigment according to the guidelines provided. This test will help you adjust the color intensity and ensure that it meets your expectations before full application.
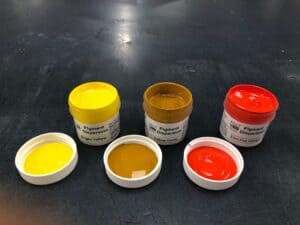
Bright Yellow, Yellow Oxide, Lead Free Orange


Measure Precisely:

For consistent color throughout your gelcoat, measure the pigment and gelcoat precisely. Consider using a digital scale for accuracy, and follow the manufacturer’s recommendations for pigment-to-gelcoat ratios. Typically, a small amount of pigment goes a long way.

Mix Thoroughly:

To avoid any color inconsistencies, mix the pigment thoroughly with the gelcoat. Ensure that there are no streaks or clumps of pigment. A mechanical mixer can be very effective in achieving a homogeneous mixture.

Apply a Test Patch:

Apply a small amount of the colored gelcoat to a part of the boat that is less visible. Allow it to cure fully according to the gelcoat’s curing instructions. This will give you a real sense of how the color looks when applied and finished.

Adjust if Necessary:

If the test patch isn’t to your satisfaction, adjust the pigment ratio as needed. Adding more pigment will deepen the color, while adding more gelcoat will lighten it.

Apply to the Boat:

Once you are satisfied with the color mix, apply the pigmented gelcoat to the boat using your chosen application method (brush and roller or spraying). Ensure even coverage to avoid blotchy areas.

By carefully selecting, testing, and applying pigment agents, you can achieve a professional and personalized appearance for your boat’s gelcoat. If you need assistance selecting pigments for your gelcoat contact the customer support team at Bottom Paint Store 888-505-2313 or via live chat found at bottompaintstore.com


How to Identify the Type of Paint on My Boat

Our customer service team often receives phone calls from customers asking how to identify the type of paint on my boat? The paint label should indicate the type of paint it is, as well as any other information about the paint. However, that may not be available.

In this case, you will need to know the surface of your vessel, for example is it aluminum, wood or fiberglass?

Once you have identified the surface, the type of boat paint can be narrowed down.

If you are looking at the topside area of a boat, and the surface has a gloss/shiny finish, the options are mainly Gelcoat or marine paint.

To tell these apart, you can use a couple of methods:

One method is to use rubbing alcohol on a white cloth and rub it over an inconspicuous area of the hull. If the surface starts to shine, then it’s likely that you have Gelcoat. Another option is to take a piece of sandpaper and gently rub it over an area where the finish appears smooth. If the paper doesn’t snag and pull up any fibers from the surface, then it’s most likely Gelcoat as well. 

If you are looking at the bottom of the boat, and the surface has a dull, flat sheen finish you most likely have some type of antifouling bottom paint. The two most popular bottom paints are self-polishing ablative and hard bottom paint.

The self-polishing ablative bottom paints work like a bar of soap, once the boat moves in the water or there is a current and or tide, the outer layer slowly wears away. It is easy to tell when a boat is painted with ablative bottom paint, simply rub it with a dry rag in an inconspicuous area of the hull. If the paint easily rubs off, you most likely have a self-polishing ablative bottom paint.

Note: compatibility within bottom paints can be tricky, we recommend checking the compatibility chart of the new bottom paint you are interested in applying, to ensure you prepare the surface correctly.

Here are the bottom paint compatibility and cross-references charts by bottom paint manufacturer:

It is important to determine the age of the paint. Again, you can look at the label on the can of paint for a date or call the source you ordered from to see if they have a record of your order. Bottom Paint Store has order records that span several years.

The final step is to evaluate the condition of the paint. If the paint is peeling, flaking, or otherwise showing signs of wear, it will need to be replaced. However, if the paint is in good condition and there are no visible signs of wear, you may be able to simply touch up any areas that are damaged.

Related Articles:

How do I know if my boat has Gelcoat on it or paint?
How to Apply Bottom Paint Over Existing Bottom Paint

Filler Options for Gelcoats and Resins

There are many common fillers used with gelcoat and resin and here we’ll help you pick the one that is right for you.

When using putty, a good rule is not to go higher than 1/8″ thick without adding a layer of glass to prevent any issues. With the various fillers, for the right working consistency, you’ll want about 60-70% mix to resin ratio.

Milled Fibers: Finer than chopped glass, makes a harder putty that is strong and coarse.

Walnut Shells: Brown in color and preferred for wood putty or nonskid since it has large particles. Good Strength and darker pigment.

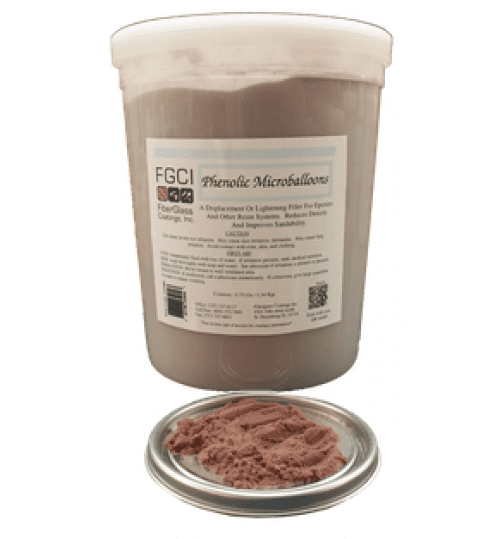
Phenolic Microballons

Microballoons or Microspheres: Phenolic spheres are generally plastic or glass and hollow, intact spheres that are lightweight. This is ideal for making fairing compounds. The Microballoons are a more expensive option for filler.

Fumed Silica: Also known as Cabosil FIller or Aerosil Filler. This is a hydrophilic fumed silica. Fumed Silica provides little change to weight, color, or physical properties after cure, used in resins and gelcoats to make them hang on vertical surfaces, (too much can cause porosity.)

Cotton Flock: Made from pieces of cotton and thickens to an off-white color. Great for bonding many substrates, especially wood. The mixture also creates a multipurpose adhesive for many other substrates in addition to providing excellent substrate wetting and penetrating characteristics. Increases impact and abrasion resistance.

Chopped Glass Fibers

Chopped Glass: These are the biggest pieces of fillers and are most popular for use with resin putty. Perfect for corners, crack resistant, and doesn’t affect pigmented gelcoat. 1/4″ glass fibers make the strongest glass reinforced putty.

Gelcoat Putty – Repair Spider Cracks And Fill Gouges!

Gelcoat putty is an indispensable part of any boat owner’s toolkit, providing a simple way to make quick and reliable repairs on any gelcoat surface. Perfect for fixing anything from spider cracks to fill in gouges and scratches, and is an easy-to-use solution that leaves a smooth finish and every application has the potential to restore gelcoat surfaces and make them look like new again. This dependable material is simple enough even novice motorboat and sailboat owners can use it without having to take their vessels out of the water for professional repair. Gelcoat putty can help anyone keep their boats looking shipshape with minimal effort.

There are many ways to repair spider cracks in boats, using our Gelcoat Repair Putty is an easy and fast way of doing it!

First, you will need to determine your spider cracks are only that, spider cracks. To do so, you will need to inspect the area for any sign of broken support. If the surface is steady and looks solid, then you have spider cracks.

In order to properly fix any spider cracks, you will have to open the cracks to fill them up correctly. This can be done by using a Dremel. Once the crack is open and it has a good size you can sand and clean the area. For cleaning, you may use acetone or soap and water.

Now, you are ready to use the Gelcoat Putty. Mix in a 1-1/2% ratio of MEK-P Catalyst into the putty and mix it properly. Use a putty knife to fill in the spider cracks. Once dry, sand the surface to a smooth finish.

For filling gauges and cracks, some tips:

This product uses MEKP, just like gelcoat so your working time is 8-18 minutes, depending on temperature. If catalyzed at 1% and it is in perfect conditions (77 F) you have a longer work time. To extend work time cool product down before use.

If filling holes, fill a little high to allow for shrinkage. Once it dries you can easily smooth it out with sandpaper. Recommended thickness at 1/4″.

Tip: You can apply gelcoat to match the color of your boat over the repair, or you can use our pigments to tint the gelcoat putty and complete the repair all at once!

Thinning Gelcoat and Using PVA

Gelcoat does not fully cure without first supplementing it with a surfacing agent or wax additive sanding aid. Gelcoat may be thinned for use in a Portable Preval Sprayer with styrene monomer. You can spray it with polyvinyl alcohol (PVA) before gelcoat reaches its gel stage (5-10 min.), or add 1oz per quart of a wax additive sanding aid.

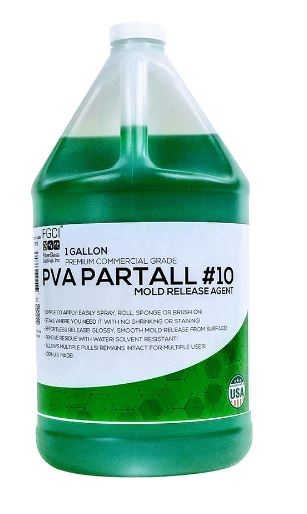
PVA or Partall Film #10 is a release agent that helps with removing parts from a mold or can be used as a surfacing agent when using gelcoat without a wax additive (sanding aid).

PVA is soluble in water making it easy to wash off. Applying can be achieved by spraying or wiping the green liquid on with a sponge. It will foam slightly but dry to a clear, glossy shine. It can take 15-30 minutes depending on temperature.

For spraying gelcoat our FGCI brand does not recommend thinning.

Generally, you should not add more than 10% Styrene by volume. Patch Booster is an additive that will thin out gelcoat and not affect colors. Follow manufacturers instructions as added Mekp may be needed.

Another thinning alternative is the Duratec High Gloss Additive. This is used with gelcoat for many reasons. Mixed at a 50/50 ratio this will produce a high gloss finish and will serve as a thinner for your gelcoat, that is why this is commonly used when spraying gelcoat. In addition, you’ll omit any additional sanding aid. After waiting a full 24 hours you can buff when cured, for a hi-gloss use 600 or higher grit paper and buff with Aqua Buff 2000 compound. Follow the manufacturer’s technical data sheet as an extra hardener may be needed. Some customers use Styrene for thinning but the manufacturer warns it can affect the gelcoat colors although this is the most cost-effective option and doesn’t have the added wax.

How to Gelcoat your Fiberglass Pool Steps

The finish of your fiberglass pool steps can fade after years of use and exposure to pool chemicals and the weather. If you notice that your pool steps are looking tacky it might be time for you to reapply gelcoat to them.

You can use Gel Coat if your pool steps currently have gelcoat or bare fiberglass for pool use. 

See the article How to Apply Gelcoat’ for more details on how to use gelcoat.