Tag Archives: epoxy resin

How to Epoxy Resin a Bar Top: A Guide to Turning Your Bar Top into a Showstopper

How to Epoxy Resin a Bar Top: A Guide to Turning Your Bar Top into a Showstopper

Whether you’re a DIY enthusiast or just someone who refuses to pay for something you could probably do yourself, coating a bar top in epoxy resin is one of the most rewarding home projects out there. With the right steps and a little patience, you’ll transform your bar from “functional” to “wow, is this granite?!” (No, but it’ll look that good). Let’s walk you through it—from prepping the surface to pouring that final glossy layer.

Step 1: Gather Your Supplies

Before we dive into the resin (not literally, though that would make for a great YouTube video), let’s talk supplies. Here’s what you’ll need for this sticky yet satisfying adventure:
 

epoxy resin kit

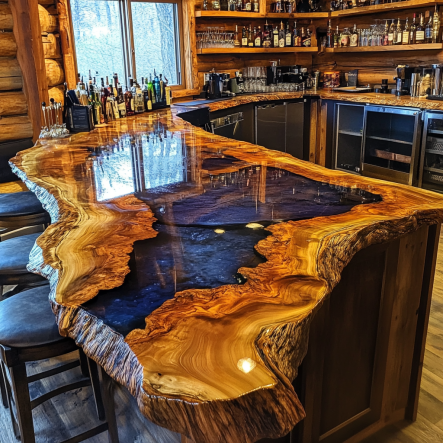
Bar top epoxy resin is a popular choice for creating clear, hard, and durable surfaces, often found on commercial bar tops and restaurant tables.

Epoxy resin: Make sure you get a good quality, clear epoxy resin designed for countertops or bar tops.

Measuring cups: You’ll need these to mix the resin and hardener in the correct ratios.

A stir stick: For mixing. We’ll explain more on the mixing process in a bit (hint: it involves a lot of stirring).

Painter’s tape: You’ll use this to create barriers around the edges of the bar, so the epoxy doesn’t dribble off like syrup on a pancake.

Sandpaper: For smoothing out any imperfections in the bar top surface before applying the epoxy.

Gloves and protective gear: Epoxy resin doesn’t come out of clothes easily, and your hands will thank you later.

A heat gun or propane torch: This will be used to remove air bubbles from the epoxy surface once it’s poured.

Drop cloths: Things will get messy. Trust me, you’ll want these.

Now that you’ve got your arsenal ready, let’s prepare that bar top!

Step 2: Prep the Surface Like a Pro

The key to a smooth, beautiful bar top lies in the prep work. Epoxy resin will show every little flaw, so it’s crucial to start with a clean, smooth surface. If you’re working with an older bar or a wooden surface, you’ll want to sand it down using fine-grit sandpaper (220 grit works well). This removes any old finishes, stains, or rough patches. Give it a wipe with a damp cloth to remove all the dust afterward.

Pro tip: Use painter’s tape to cover any areas where you don’t want the resin to go. Also, make sure your bar top is perfectly level—epoxy resin is a bit of a diva and will flow downhill if given the chance.

Step 3: Mix It Up

Now comes the moment of truth—mixing the epoxy resin. Most resins come with a two-part system: resin and hardener. These need to be mixed in the exact ratios specified by the manufacturer, usually 1:1 or 2:1.

Step-by-step mixing instructions:

Pour the resin into one measuring cup.

Pour the hardener into another.

Combine them in a larger container and stir like you’ve never stirred before. Keep mixing for at least 3-5 minutes to ensure they’re fully combined. Don’t rush this step; if the resin isn’t mixed properly, it won’t cure correctly, and you’ll be stuck with a sticky mess.

Pro tip: Scrape the sides and bottom of the container as you stir to avoid any unmixed resin or hardener clumps.

Step 4: The Pour

This is where things get exciting (and potentially very sticky). Once your resin is fully mixed, it’s time to pour it over the bar top. Start by pouring in the center and allow the resin to spread outward. Use a foam brush or plastic spreader to help guide it evenly across the surface.

Don’t worry too much if it looks a bit uneven at first; the resin will self-level over time. Your main job is to make sure it covers every square inch of the bar top.

Step 5: Banish Those Bubbles

One thing about epoxy resin: it loves bubbles, but we don’t. After pouring, you’ll notice tiny bubbles rising to the surface. This is where your heat gun or propane torch comes into play. Pass it gently over the surface, just a few inches above, and watch as the bubbles disappear like magic. Be careful not to linger too long in one spot, though—you’re trying to pop bubbles, not cook dinner.

Step 6: Let It Cure

Now comes the hardest part: waiting. Depending on the type of epoxy resin you’re using, curing time can take anywhere from 24 to 72 hours. During this period, keep the bar top covered to prevent dust, bugs, or curious pets from getting into the wet resin.

Step 7: Apply Additional Coats (If Necessary)

Once the first coat has cured, you may want to apply additional layers for added depth and durability. If you’re satisfied with the first coat, congratulations! You’re done! If you want that extra-thick, glass-like finish, repeat the mixing and pouring process until you’ve achieved your desired thickness.

Step 8: Enjoy Your Handiwork!

As your friends admire your new, super-glossy bar top pat yourself on the back, pour yourself a cold one, and bask in the glory of a job well done. Not only have you saved a ton of money by doing it yourself, but you’ve also added a touch of craftsmanship that’s guaranteed to impress anyone who visits.

Ready to Protect Your Bar Top?

Now that you know the ropes, it’s time to get started and create that high-gloss magazine look or at least keep your surface spill-proof. If you need any assistance selecting a good bar top epoxy resin you can always call the Bottom Paint Store customer support team 888-505-2313.

The different uses for Hawk Epoxy

If you’re a boat owner, there’s a good chance you’re familiar with Hawk Epoxy by SeaHawk Paints; however, did you know there are several diverse ways to use it? In this post, we’ll take a look at some of the different ways Seahawk Hawk Epoxy can be used to keep your boat in top condition. So, whether you’re a beginner or an experienced boater, read on for some helpful tips!


What is epoxy?


Epoxy is a type of adhesive that is commonly used to bond two surfaces together. It is made up of a resin and a hardener, which are mixed together to form a tough, durable bond.

Unlike other sealants, epoxy is able to form a strong bond with the surface it is applied to, making it an ideal choice for sealing concrete, metal, and glass. Epoxy is also resistant to temperature changes and UV light, making it ideal for use in outdoor applications. In addition to its practical benefits, epoxy can also be used to create interesting visual effects. When applied to a surface in thin layers, epoxy can create a marbled or even tie-dye effect. As a result, epoxy is a versatile material that can be used for both functional and decorative purposes.Epoxy is typically used for repairing metal, plastic, and glass.

It can also be used for bonding wood, concrete, and ceramic. Epoxy is available in both liquid and powder form. The liquids are typically used for small repairs, while the powders are better suited for larger projects. Epoxy is typically applied with a brush or roller. Once it has been applied, it needs to be allowed to cure for 24 hours before it can be used.

Hawk Epoxy can be used as a sealant to protect surfaces from water and other elements.

Hawk Epoxy

Fairing Hull Imperfections with Hawk Epoxy


Let’s face it, our boats take a beating. They’re exposed to the sun, the salt, the waves, and the wind on a daily basis. So, it’s no wonder that even the best-kept boats can start to show their age after a few years. One of the most common problems is fairing hull imperfections. These are small cracks or indents in the gelcoat that can make your boat look old and worn. But don’t despair, there is a simple way to fix this problem with hawk epoxy.
Hawk epoxy is a two-part epoxy resin that you mix together to create a putty-like substance. Once it’s mixed, you can use it to fill in any cracks or indentations in your hull. It dries hard and sets fast, so you can sand and paint over it once it’s dry. And best of all, it’s very affordable. So, if your boat is starting to look a little worse for wear, don’t worry, just grab some hawk epoxy, and give your boat a facelift.

Patching Holes in a Boat with Hawk Epoxy


There’s nothing worse than getting your boat out on the water only to find that it’s taking on water. Fortunately, patching holes in a boat is relatively easy to do, as long as you have the right materials.

Hardware Replacement Adhesion with Hawk Epoxy


Hawk epoxy’s two-part epoxy provides a strong, permanent bond and can be used on a variety of materials, including metal, glass, ceramic, and plastic. And it sets in just minutes, so you won’t have to wait around for hours for it to dry. Plus, it’s easy to use – just mix the two parts together and apply it to the surfaces you want to bond.

Hawk Epoxy Proper Measuring and Mixing


Anyone who has ever worked with epoxy knows that it is crucial to get the measuring and mixing process exactly right. Too much or too little of either ingredient can ruin the entire batch, and that can be a costly mistake. Hawk Epoxy strives to make the measuring and mixing process as simple and foolproof as possible. Our epoxy products come with clear instructions and easy-to-use tools that make it easy to get the perfect mix every time. If you follow the provided instructions, you can be confident that your epoxy project will turn out just the way you want it to.

Applying Hawk Epoxy


Hawk epoxy is specifically designed for use on boats, and it’s perfect for patching small holes. The epoxy comes in two parts that you mix together, and then it can be applied directly to the hole.
Sometimes, you need something more than just epoxy resin. That’s where Hawk epoxy fiberglass cloth and mat come in. The cloth and mat help to reinforcing the epoxy, making it stronger and more durable. They can be used to repair cracks, leaks, or holes in a variety of surfaces, including concrete, metal, glass, and wood. Best of all, the cloth and mat are easy to apply and can be cut to fit any size or shape. So, whether you’re patching up a small crack or fixing a large hole, Hawk epoxy fiberglass cloth and mat can help you get the job done right.
First, clean the area around the hole with sandpaper to make sure that the epoxy will adhere properly. Then, mix the epoxy according to the instructions and apply it to the hole. Once it dries, the epoxy forms a strong bond that will keep the hole sealed. It is important to note that the curing time may vary depending on your temperature and humidity levels.
Once properly applied and cured your boat will be good as new – no leaks guaranteed!

Sealing a Fiberglass Hull with Hawk Epoxy


Sealing a fiberglass hull with epoxy is a great way to extend the life of your boat. Epoxy is a strong, durable material that will create a waterproof barrier between the hull and the water. It is important to properly prepare the surface before applying the epoxy, and to follow the manufacturer’s directions closely. Once the epoxy has been applied, it is important to allow it to cure properly before using the boat. With proper preparation and care, sealing a hull with epoxy will help to keep your boat in good condition for many years to come.


How to apply Hawk Epoxy


Epoxy is a type of synthetic resin that is often used as an adhesive or coating. It is typically made up of two parts that are mixed together and then cured to form a hard, durable finish. Hawk Epoxy by SeaHawk paints is a two-part epoxy that can be used for a variety of applications, including bonding, coating, and laminating. Before using Hawk Epoxy, it is important to read the instructions carefully and to follow all safety precautions. Once you have mixed the two parts of the epoxy together, you will have a limited time to apply it before it begins to set. For best results, apply the epoxy to a clean, dry surface and use a brush or roller to spread it evenly. Once it has been applied, the epoxy will need to cure for 24 hours before it is fully cured. However,

Hawk Epoxy is a versatile product that can be used in many different ways. We’ve highlighted just a few of the potential applications for this amazing adhesive. If you have questions for how to use Hawk Epoxy or need help bringing your boat painting project to life, contact the Bottom Paint Store customer service team Monday through Friday 9-5 EST 888-505-2313.

How To Patch a Hole in a Fiberglass Boat

A fiberglass boat is a great investment. They are durable and can last for years with proper care. But like anything else, they are not indestructible and will eventually need to be repaired. One of the most common repairs is patching a hole in the hull. Fortunately, this is a relatively easy repair that can be done by anyone with basic fiberglass repair skills.

The first step is to clean the area around the hole. This will remove any dirt or debris that could prevent the patch from adhering properly. Next, cut a piece of fiberglass cloth that is slightly larger than the hole. Apply a generous amount of fiberglass resin to the cloth and then place it over the hole. Use a roller or brush to smooth out the cloth and remove any air bubbles. Allow the resin to cure for 24 hours before sanding down the area and painting over it. With a little time and effort, you can have your fiberglass boat looking like new again.

A major fiberglass repair, such as patching a hole, can be a daunting task. Watching a professional do the job can help you get on the right track and be confident in doing the repair yourself. This step-by-step video tutorial produced by Sea Hawk Paints will show exactly what needs to be done when patching a hole in your fiberglass boat.

Note: Before attempting a repair by yourself, get a professional opinion. Always wears Personal Protective Equipment when sanding or working with chemical compounds! Respirator, safety glasses and gloves are always recommended.

Here is a list of products you will need for the repair:

  1. Hawk Epoxy Resin Kit – It contains the epoxy resin, catalyst and filler for the job.
  2. F5 Light Density Filler
  3. Biaxial Fiberglass matting
  4. 50 grit, 80 grit, and 100 grit sandpaper or grinding pads

Hawk Epoxy Video Tutorial

For more information see these other How To Articles:

Filling a Hole in Fiberglass

How Do I Choose Hawk Epoxy Catalyst and Fillers?

How to Mix Hawk Epoxy Resin Properly

Fairing Hull Imperfections


How to Get Strong Hardware Adhesion with Hawk Epoxy

epoxy repair kitWhat is the best way to achieve maximum adhesion when replacing your boat’s hardware? This How To article will give you the basic knowledge you need to get your repair done correctly.
Note: Before attempting a repair by yourself, get a professional opinion. Always wears Personal Protective Equipment when sanding or working with chemical compounds!

Here are some simple steps to follow when bonding hardware to your boat:

  1. Sand both the surface and the hardware to get maximum adhesion.
  2. Wet out the surface with Hawk Epoxy.f2-filler-large-may-2014-150x150
  3. Wait a few minutes for it to soak in.
  4. Wet out the Hardware base with Hawk Epoxy.
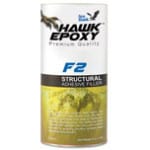
  5. Mix another batch of Hawk Epoxy with F2 Structural Adhesive Filler.
  6. Coat the hardware base, screw threads, and surface mount with the epoxy/filler compound.
  7. Tighten hardware bolts until some epoxy mixture squeezes out.
  8. Use your finger to fillet the excess mixture around the hardware base for extra strength.
  9. Before using the hardware, allow the bond to cure overnight.

Hawk Epoxy Video Tutorial

For more information see these other How To Articles:

How Do I Choose Hawk Epoxy Catalyst and Fillers?

How to Mix Hawk Epoxy Resin Properly

Filling a Hole in Fiberglass

Fairing Hull Imperfections

Fairing Hull Imperfections

hawk-epoxy-Large-May-20141What is Fairing?

Fairing is process of smoothing out and restoring the damaged surface of the hull. A fairing compound such as Epoxy resin can be used to fill in divots or gouges and then be sanded to a smooth finish. This restores the surface to its original shape and also prepares it for painting.

Note: Before attempting a repair by yourself, get a professional opinion. Always wears Personal Protective Equipment when sanding or working with chemical compounds!

Here are some guidelines to fairing out imperfections in your hull:

  1. Sand all loose surface debris and hard edges.f5-filler-large-may-2014
  2. Rid surface of debris with clean cloth.
  3. Wet out surface with Hawk Epoxy.
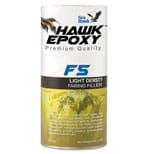
  4. Mix another batch of Hawk Epoxy with F5 Light Density Filler and apply to repair area.
  5. Use long strokes to spread out filler compound over the damaged hull. Apply until the mixture is slightly raised above the hull surface. Make sure the compound extends beyond the repair area.
  6. Let cure 6 hours.
  7. Add skim coat of F5 Filler / Epoxy compound to achieve a very smooth surface. Let cure.
  8. Sand the repair to the desired shape with 80 grit sandpaper.
  9. Finish by applying another 2 or 3 layers of Hawk Epoxy Resin.
  10. The surface is ready to be painted!

Hawk Epoxy Video Tutorial

For more information see these other How To Articles:

How Do I Choose Hawk Epoxy Catalyst and Fillers?

How to Mix Hawk Epoxy Resin Properly

Filling a Hole in Fiberglass

How to Get Strong Hardware Adhesion with Hawk Epoxy


Which Resin Should I Choose?

When it comes to boat repair, epoxy and polyester resins are both popular choices. But which one is the best option? Epoxy resin is known for its strong bonding properties, making it ideal for repairing cracks and holes. It also has excellent waterproofing qualities, making it ideal for boats that spend a lot of time in the water. Polyester resin, on the other hand, is a bit more flexible than epoxy, making it better suited for repairs that require some give. It’s also less likely to yellow over time, making it a good choice for boats that will be spending a lot of time in the sun. Ultimately, the best choice of epoxy or polyester resin for boat repair depends on the type of project you are tackling. 


General Purpose Repair Epoxy Resin Kit

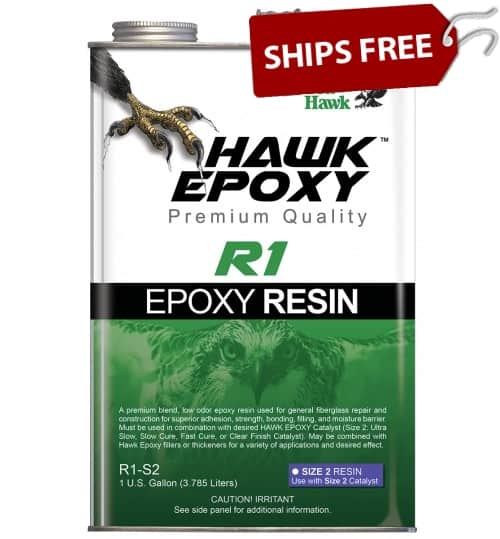
Hawk Epoxy KitEvery household should own a Hawk Epoxy Kit like this. You can use it to repair anything around your home or own your boat. This kit comes with the resin, catalyst and your choice of filler. Just mix them together and you have an excellent bonding, filling, or adhesive paste.

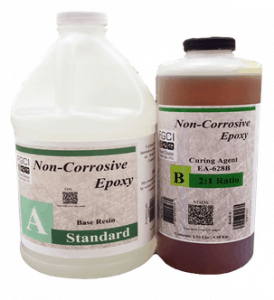
FGCI General Purpose Resin is used for laminating with fiberglass, kevlar and carbon reinforments. It can be tinted with pigment up to 3% and best results are when used at 70-85 degrees F. Hardener varies depending on thickness of fiberglass, the more fiberglass the less hardener as you will generate more heat-never go below 1%. Complete cure needs sanding aid added to resin or PVA while still hot.

Polyester Resin:

MARINE ResinPolyester resins are unsaturated resins that are combined with hardeners, such as MEKP.

Polyester resin is used more for fiberglass lay-up or if you’re going to finish a repair with gelcoat, as the polyester resin will bond to the gelcoat better than epoxy. It is also cheaper than epoxy and a great choice when casting deep molds.

Various Types of Polyester Resin:

Boatyard Polyester Resin is a non-specified resin that contains different types of polyester resins and wax. Boatyard Polyester Resin is not recommended for use below the waterline. The material may cure hard and tack-free due to the included wax. If so, the product will need to be sanded prior to adding another layer in order to promote good bonding.

Clear Casting Polyester Resin is used to cast small objects into a mold. This method can be used to create sculptures, crafts, or industrial prototypes.

Surfboard Polyester Resin is Clear & wax free. It is ideal for building & repairing surfboards because it cures to an almost clear color when applied in a film. Also it highlights underlying graphics.

Iso Marine Resin is based on isophthalic acid. This resin is a step above the general purpose polyester resin and that is reflected in the price. Iso Resin is stronger, more durable, and is the best choice when applying in corrosion environments or elevated temperatures.

Vinyl Ester Resin:

Vinyl ester resins are formulated with a base of polyester resin strengthened with epoxy molecules (a hybrid form of polyester and epoxy and aiding for gelcoat to bond with epoxy) and also use peroxides, such as MEKP, for hardening. These are cheaper than epoxy resins and more expensive than polyester. Ideal temp for use is 77 F, not applied over 1/8th thickness or it will generate too much heat.

Vinyl esters are more tolerant of stretching, less likely to show stress cracking and more resistant to water penetration. Vinyl ester is the choice when improved resistance to moisture is the goal (like repairing a blistered hull).

Long term water exposure (hull or water tank) or if impact resistance is important vinyl ester is usually chosen.

Epoxy Resin:

Epoxy resins are cured with the addition of a hardener. Unlike the polyester and vinyl ester resins, cured with a small amount of catalyst, epoxy resins usually require a lot more, often 1:1 or 2:1. A epoxy resin is the most expensive of these.

Epoxy resin has the best bonding strength as it will bond dissimilar or already cured materials for strong, reliable repair work. This is the most expensive resin but offers the most in its ability to flex, prevent delamination and ease of repair work.

If doing a repair and not overlaying with gelcoat then the epoxy will perform best as it tends to act as a stronger “glue” for the patch to the surrounding surface.

Laminating Epoxy Resin is the correct choice for repairing boats. It is super durable and has high resistance to water. Also, it has very good adhesion to a variety of surfaces including metals, plastics, fiberglass, wood, and glass.  The ratio is well suited for use with high-solids marine, maintenance coating and bonding agents.  The cure time is three days in the sun or a week if it is not. Set time changes with activator and film thickness.  If there is an excessive amount of activator applied , the laminating epoxy will be soft and rubbery. In contrast, if there is not enough activator, the epoxy will not cure hard. Laminating Epoxy is available in 3 different ratios that provide different working and cure times.


Epoxy Resin (Bar Top Epoxy Resin):

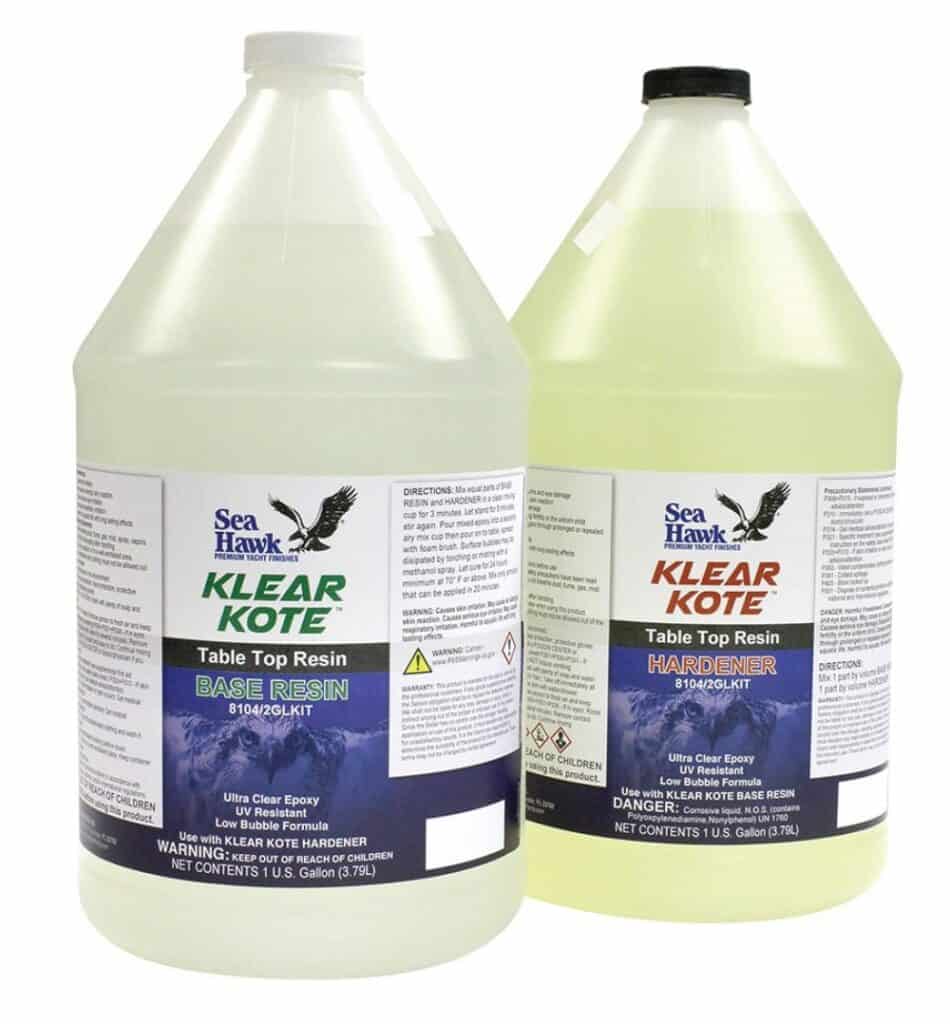
A Premium Commercial Grade Clear Epoxy Resin – Klear Kote Epoxy Resin is used extensively in coating surfaces and in table tops where a clear, hard and durable coating is required. Commonly seen on bar tops and restaurant tables. Easy to use 1:1 mixing ratio of resin and hardener.  Items coated with it will become permanently preserved and protected for your enjoyment throughout a lifetime. The epoxy resin will not exhibit blushing or sweat out under high humidity conditions.

Epoxy Resin Kits

epoxy resin kit

Epoxy resin kits are sold in two parts, A and B, which should be applied in two stages. The first stage is referred to as the seal coat. The seal coat is brushed on in a thin layer and is used to seal any pores on the surface and prevent air bubbles from forming in the following flood coats. This stage is followed by the flood coat, which will flow and self-level, clean brushes or squeegees can be used to help spread the epoxy. Flood coats are applied in 1/8″ layers at a time, as many as desired can be applied, however, one to three coats is average for most table or bar coatings. Resin kits are often applied on bar tops and tabletops in many bars and restaurants.

Superbond Standard Epoxy Glue

Superbond Standard Epoxy Glue is a two-part, 1:1 epoxy adhesive that has a Vaseline consistency. The product adheres to nearly everything and is a favorite among woodworkers. It’s offered in a fast curing agent, giving 8-15 minutes of working time; a medium, giving 20-30 minutes, and a standard, offering 30-45 minutes. SuperBond is offered in sizes from ½-pint tubs all the way to 5-gallon pails.

Rot Stop Epoxy

Rot stop epoxy is a 2-part epoxy that is 1:1 ratio and is very simple to mix. The coverage is similar to other epoxies, and like other epoxies, the product does vary in thickness based on temperature. The advantage of Rot Stop is it is NOT affected by moisture, making it excellent for deck or flooring and cracking repair, especially moisture damage.

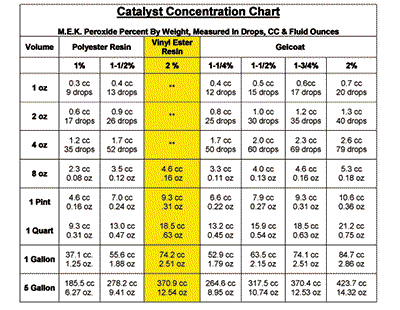
See catalyst chart for mixing guidance:

MEKP Chart
The weight of MEKP is 1/125 grams per CC. 30 Drops is approximately equal to one CC (Cubic Cementer)
NOTE: Using drops for catalyst is only an estimate. In Critical applications MEKP should be measure by using CC’s or Fluid Ounces which are volume measurements. The percentages in the chart: 1% thru 2% are percentages of gelcoat by weight.The CC’s and OZ’s values in the chart have been converted from weight of MEKP to volumes of MEKP.

Resin guns

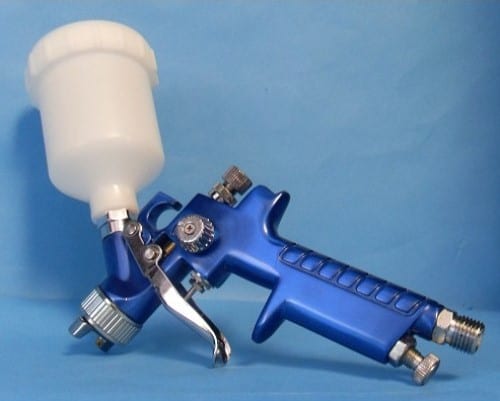
Gelcoat and resin spray guns are ideal for large surface spraying, such as new mold construction, composite refinishing and large boat surfaces.  Look for a resin gun with a blue die cast body which will ensure a long life. Most HVLP cup guns use nylon flat seal just behind the threads that the air cap attaches to.

resin gun

If you have used a spray gun with a nylon flat seal just behind the threads that the air cap attaches to and cleaned it with acetone, the seals disintegrate so it is best to use one with a plastic seal.