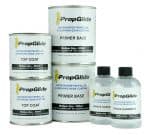
![]() PropGlide is an environmentally friendly foul release coating for boat propellers and running gear which prevents the attachment of marine growth by low critical surface tension. PropGlide does not contain cuprous oxide or TBT compounds or any other toxic substances which might cause environmental pollution. PropGlide is sold in 4 size kits. Sailboat, Small, Medium and Large. For the best size kit for your application see: Which PropGlide Kit Size Do You Need?
PropGlide is an environmentally friendly foul release coating for boat propellers and running gear which prevents the attachment of marine growth by low critical surface tension. PropGlide does not contain cuprous oxide or TBT compounds or any other toxic substances which might cause environmental pollution. PropGlide is sold in 4 size kits. Sailboat, Small, Medium and Large. For the best size kit for your application see: Which PropGlide Kit Size Do You Need?
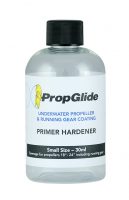
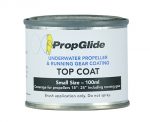
Each PropGlide Kit contains various sizes of Primer Base (Part 1), Primer Hardener (Part 2), and a Clear Top Coat.
 Sailboat Kit 175ML Kit (#PCK-175) Contents: 60ML Primer Base, 15ML Primer Hardener, 100ML Clear Topcoat
- Small Kit 250ML Kit (#PCK-250) Contents: 120ML Primer Base, 30ML Primer Hardener, 100ML Clear Topcoat
- Medium Kit 625ML Kit (#PCK-625) Contents: 300ML Primer Base, 75ML Primer Hardener, 250ML Clear Topcoat
- Large Kit 1125ML Kit (#PCK-1125) Contents: 2-300ML Primer Base, 2-75ML Primer Hardener, 2-250ML Clear Topcoat
This PropGlide Technical Data & Application Guide will detail how to apply any size kit of PropGlide by detailing the best preparation of the surface and application of the etching primer, and the final application of the Clear Topcoat.
Preparation of the Surface
The preparation of the surfaces to be coated with PropGlide is the key for the product to work effectively.
1. Remove previous coatings, fouling organisms/marine growth from metal surfaces. All substrates that are to be coated with PropGlide must be bare metal. These areas should be machine sanded with a Dual Action sander fitted with a soft pad and 60-80 grit abrasive discs sandpaper. Sanding the surface by hand is recommended at hard-to-reach areas where the dual action sander cannot reach. Use 60 – 80 grit wet/dry sandpaper, with water as a lubricant. Make sure the sand paper is changed frequently to ensure the necessary profile is achieved. Hand sanding these hard-to-reach areas is required to ensure the surface is properly abraded. The shaft should be done with hand sanding rather than using a machine. From this point forward, there shouldn’t be any direct hand contact to areas which are to be coated with PropGlide. It is advisable to wear latex gloves as it will ensure the areas to be painted remain clean and sound.
2. Once the surface sanding process is completed, wash all the areas with clean fresh water and wipe with clean, lintfree cotton rags soaked in water to wipe off sanding residue. Continue doing this until the rags don’t show any sign of residue, contaminants or discoloration.
3. After cleansing with water is completed, use a rag soaked in acetone or denatured alcohol to remove water on the sanded surface.
Continue to use the rag until it becomes dry from evaporation of the acetone or denatured alcohol. Use one or more rags as required, until the rag looks white clean, as there will be no contaminants when the rag is white clean. Again, care should be taken not to touch cleaned surfaces with bare hands. This is because fingers and hands contain oils which can transfer to the cleaned surfaces and therefore would inhibit the adhesion of the coatings.
Apply the Etching Primer
There is a Primer Base (Part 1) and a Primer Hardener (Part 2) to activate the primer base. This two-component etching primer dries chemically by reaction of the mixed components and provides protection against corrosion and increases the adhesive property of the subsequent coats. It may be used as a pre-treatment primer on non-ferrous metals such as bronze and aluminum as well as zinc and galvanised iron. May also be used as pre-treatment primer on blast-cleaned steel plates.
Temperature Limitations: Primer and Topcoat should be brought to 70-80°F (21-27°C) temperature range prior to mixing and application. Apply in good weather conditions when air and surface temperatures are above 50°F (10°C). Surface temperature must be a least 50°F (10°C).
PropGlide Etching Primer Physical Properties

 Mixing Ratio: Primer Base (Part 1) : Primer Hardener (Part 2) = 4 : 1 by volume
- Colour: Primer Base (Part 1) : Yellow, Primer Hardener (Part 2) : Clear
- Dry Film Thickness: 8 microns
- Drying Time: 5-15 minutes touch dry (temperature dependent)- 1 hour hard dry @ 20°C/68°F
Painting Interval: Apply PropGlide Clear TopCoat when Etching Primer is just touch dry Pot Life: 8 hrs @ 20°C/68°F
1. Agitate the Primer Base (Part 1) contents by scraping the bottom and sides of the can, as there will be settling. Mix contents of primer until the settled parts are incorporated back into solution and uniformly blended. Do not strain material, even if particles are present.
2. Stir Primer Hardener (Part 2) then add entire contents to the Primer Base (Part 1) container. Mix primer base and hardener for 30 seconds and apply mixture to sanded surface immediately after mixing.
3. Application of the Primer Base/Hardener mixture should be thin. The film should be thin enough, so that it is barely coating the surface, yet it does not provide sections or lines on the sanded surface that are not coated. Do not touch the primer mixture as it dries. The method of application of the primer may be done by using either a natural bristle brush or foam roller. 4. Apply a second coat of Primer Base/Hardener mixture after the first coat dries.
Apply the Clear Top Coat
The Clear Top Coat that should be applied to the last coat of Etching Primer within 5-15 minutes. The Clear Top Coat serves as a slick finish that will inhibit marine growth from attaching to the surface.
PropGlide Clear Top Coat Physical Properties:
 Binder type: Silicone Polymer
- Solvent: Xylene
- Colour: Clear coating
- Finish: Glossy
- Dry time: 45 minutes touch dry ; 8 hours hard dry @ 20°C
- Recommended film build: 75 microns per coat
- Thinning: N/A
- Clean up: Acetone
- Shelf life: 12 months
1. After 5 to 15 minutes (depending on temperature) of applying the 2nd coat of Primer/Hardener mixture promptly apply the Top Coat. Application of Top Coat should be thicker than Primer/Hardener mixture, yet not thick enough so that the Top Coat produces runs. The Top Coat is to be applied with brush only, NO foam applicators are to be used.
2. Let the Top Coat dry overnight before launching.
