Customizing the color of your boat is an exciting way to make it stand out on the water. With advances in DIY techniques and materials, achieving a professional-quality look is within reach for boat enthusiasts. Whether you’re looking for a sleek modern finish or a vibrant and bold design, here are some innovative DIY methods to help you customize your boat’s colors.
Prepping the Boat Surface: The Foundation for Success
Before diving into the creative aspects, proper surface preparation is crucial. Begin by cleaning the hull and removing any old paint, wax, or grime that could interfere with the new finish. Sanding down the surface ensures that your new paint or coating adheres smoothly. After sanding, wipe the area with a solvent such as acetone to eliminate dust and particles.
Choosing the Right Paint: Polyurethane and Gelcoat Options
One of the most effective DIY techniques for custom boat colors involves using polyurethane or gelcoat paints. Polyurethane paints are durable, resistant to UV rays, and come in a wide range of vibrant colors, making them a popular choice for those looking for a glossy, professional finish. Gelcoat, on the other hand, offers excellent protection and is ideal for fiberglass boats, creating a long-lasting, glossy surface that holds color well.

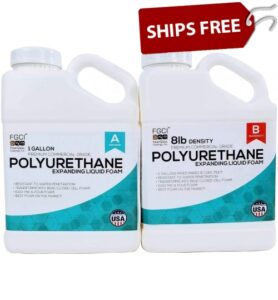
Poly-U-Foam is a 2 part polyurethane foam that provides excellent flotation, soundproofing or insulation.
If you’re aiming for a high-gloss finish with deep, rich colors, polyurethane is the way to go. This paint can be applied using a spray gun for an even, flawless look, but it’s important to apply multiple thin layers, allowing each coat to cure fully before applying the next.

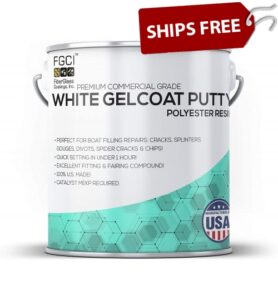
Gelcoat Repair Putty is the BEST choice if you’re in need of a fiberglass gelcoat repair kit! If you are wondering how to repair fiberglass or gelcoat on a boat then this Gelcoat Putty is the ONLY product you’ll need to use, and the easiest way to fix it!
Tape Off & Stencil for Unique Patterns
To create unique designs or patterns, using painter’s tape and stencils can elevate your boat’s color customization. After applying the base color, use painter’s tape to outline stripes, shapes, or even intricate designs. You can also purchase stencils or make your own to add logos, images, or detailed patterns to your boat’s hull.
This technique works especially well for those who want to incorporate multiple colors into the design. Start by applying the lightest color first, then use stencils or tape to mask areas before applying additional colors. After the paint dries, carefully peel off the tape to reveal crisp, sharp edges.
Airbrushing: A Technique for the Creative Boater
For more intricate and custom designs, airbrushing offers an artistic flair. Airbrush kits allow you to blend colors and create gradient effects, adding depth and texture to your boat’s finish. This technique is perfect for creating custom logos, images, or even marine life designs that can make your boat a one-of-a-kind work of art.
When using an airbrush, it’s essential to practice on scrap material first to get a feel for how the paint sprays and to perfect your design. Thin layers and multiple passes with the airbrush will help prevent dripping and ensure smooth transitions between colors.
Vinyl Wrapping: The Quick & Removable Solution
If painting feels too permanent or time-consuming, consider vinyl wrapping as an innovative and easily customizable option. Vinyl wraps come in endless color options and finishes, from matte to glossy, metallic, or even textured surfaces like carbon fiber. The best part about vinyl wrapping is that it’s fully reversible—you can change your boat’s appearance as often as you like without committing to a permanent paint job.
Applying vinyl wrap yourself requires patience and attention to detail. Begin by measuring your boat to ensure you purchase enough vinyl, and carefully apply the wrap using a heat gun and squeegee to smooth out any bubbles or wrinkles.
Metallic Flake for a Dazzling Effect
Adding metallic flake to your boat’s paint job is an innovative way to give it a shimmering, dazzling appearance on the water. You can mix metallic flake into a clear coat or specialized paint, which is then applied over the base color. This technique is particularly popular for those who want their boat to catch the light and shine with a reflective, almost glittery effect.
When working with metallic flake, be sure to use fine particles and apply in thin layers. Too much flake at once can create an uneven texture, so build up the shine gradually for a smooth, professional look.
Glow-in-the-Dark Paint: Stand Out at Night
For boaters who want their vessel to shine day and night, glow-in-the-dark paint is a fun and innovative technique. This type of paint absorbs sunlight during the day and glows after dark, making your boat visible in low light conditions or after sunset. Available in various colors, glow-in-the-dark paints can be applied as accents or incorporated into larger designs for a unique nighttime effect.
Finishing Touches: Sealing Your Work
Once your custom design is complete, sealing the paint job is essential to protect your hard work from the elements. Applying a UV-resistant clear coat not only enhances the shine of your boat’s new color but also protects it from fading and damage caused by sun exposure. For extra protection, some DIYers opt for a ceramic coating, which provides a durable, glossy finish that repels water and dirt, keeping your boat looking pristine for longer.
Final Thoughts
Customizing your boat’s color doesn’t have to be an overwhelming project. With the right tools, materials, and a little creativity, you can achieve a stunning and personalized look that will make your boat stand out on the water. Whether you go for bold patterns, intricate airbrushed designs, or a simple color change, these innovative DIY techniques make it possible to create a finish that reflects your unique style.

