Category Archives: Boat Repairs

How to repair gauges in a fiberglass boat

Are your boat’s gauges not working properly? The good news is repairing gauges in a fiberglass boat can be a straightforward process if the damage is minimal and limited to the gauge itself. In this blog post we’ll cover how to repair it.

Tools and Materials Needed:

  • Replacement gauge (if necessary)
  • Screwdrivers
  • Pliers
  • Wire stripper and crimping tool
  • Heat gun or lighter
  • Electrical tape or heat shrink tubing
  • Marine-grade adhesive/sealant (e.g., 3M 5200)
  • Sandpaper (various grits)
  • Fiberglass repair kit (if there are cracks around the gauge)

Step-by-Step Instructions:

Assess the damage

First start off by examining the gauge and the surrounding area for any visible damage. If the gauge is simply malfunctioning, you may not need to repair the fiberglass itself. However, if there are cracks or holes around the gauge, you’ll need to address those as well.

Disconnect the power

Make sure your boat’s electrical system is turned off, and disconnect the power to the gauge by removing the appropriate fuse or disconnecting the battery.

Remove the Old Gauge:

Use a screwdriver or pliers to carefully remove the screws or fasteners holding the old gauge in place. Gently pull the gauge out of its mounting hole.

Disconnect the Wiring:

Carefully disconnect any electrical wiring connected to the old gauge. Take note of the wire colors and their corresponding terminals.

Test the Replacement Gauge (if applicable):

If you have a replacement gauge, test it to make sure it works before installing it. Connect the wires according to the manufacturer’s instructions and verify that it functions properly.

Prepare the Mounting Hole:

If the old gauge left any adhesive or sealant residue in the mounting hole, clean it thoroughly. Sand the edges of the hole lightly to create a clean, rough surface for better adhesion.

Install the Replacement Gauge:

Connect the wires to the corresponding terminals on the new gauge. Use crimp connectors and cover the connections with heat shrink tubing or electrical tape to protect against moisture. Insert the new gauge into the mounting hole and secure it with screws or fasteners.

Seal Around the Gauge:

Apply a marine-grade adhesive/sealant (such as 3M 5200) around the edges of the gauge where it meets the fiberglass. This will create a watertight seal and prevent moisture from getting behind the gauge.

Reconnect Power:

Reconnect the power to the gauge by reinstalling the appropriate fuse or reconnecting the battery.

Test the Gauge:

Turn on the boat’s electrical system and test the new gauge to ensure it’s functioning correctly.

Repair Cracks (if needed):

This typically involves sanding, applying fiberglass resin, and/or a fiberglass Fiberglass Chopped Strand Mat  and allowing it to cure.

If there were cracks or damage in the fiberglass surface around the old gauge see our How to Repair a Fiberglass Boat: A Step By Step Guide.

Final Inspection:

Once the repair is complete and the adhesive/sealant has cured, inspect the area around the gauge to ensure there are no visible cracks or gaps.

By following these steps, you should be able to repair or replace gauges in your fiberglass boat. If you’re unsure about any aspect of the repair or if the damage is extensive, consider consulting a professional boat repair technician for assistance.

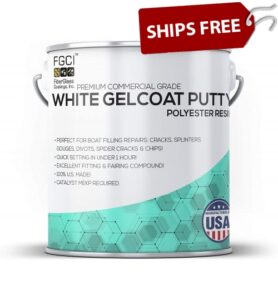
Gelcoat Putty – Repair Spider Cracks And Fill Gouges!

Gelcoat putty is an indispensable part of any boat owner’s toolkit, providing a simple way to make quick and reliable repairs on any gelcoat surface. Perfect for fixing anything from spider cracks to fill in gouges and scratches, and is an easy-to-use solution that leaves a smooth finish and every application has the potential to restore gelcoat surfaces and make them look like new again. This dependable material is simple enough even novice motorboat and sailboat owners can use it without having to take their vessels out of the water for professional repair. Gelcoat putty can help anyone keep their boats looking shipshape with minimal effort.

There are many ways to repair spider cracks in boats, using our Gelcoat Repair Putty is an easy and fast way of doing it!

First, you will need to determine your spider cracks are only that, spider cracks. To do so, you will need to inspect the area for any sign of broken support. If the surface is steady and looks solid, then you have spider cracks.

In order to properly fix any spider cracks, you will have to open the cracks to fill them up correctly. This can be done by using a Dremel. Once the crack is open and it has a good size you can sand and clean the area. For cleaning, you may use acetone or soap and water.

Now, you are ready to use the Gelcoat Putty. Mix in a 1-1/2% ratio of MEK-P Catalyst into the putty and mix it properly. Use a putty knife to fill in the spider cracks. Once dry, sand the surface to a smooth finish.

For filling gauges and cracks, some tips:

This product uses MEKP, just like gelcoat so your working time is 8-18 minutes, depending on temperature. If catalyzed at 1% and it is in perfect conditions (77 F) you have a longer work time. To extend work time cool product down before use.

If filling holes, fill a little high to allow for shrinkage. Once it dries you can easily smooth it out with sandpaper. Recommended thickness at 1/4″.

Tip: You can apply gelcoat to match the color of your boat over the repair, or you can use our pigments to tint the gelcoat putty and complete the repair all at once!

Thinning Gelcoat and Using PVA

Gelcoat does not fully cure without first supplementing it with a surfacing agent or wax additive sanding aid. Gelcoat may be thinned for use in a Portable Preval Sprayer with styrene monomer. You can spray it with polyvinyl alcohol (PVA) before gelcoat reaches its gel stage (5-10 min.), or add 1oz per quart of a wax additive sanding aid.

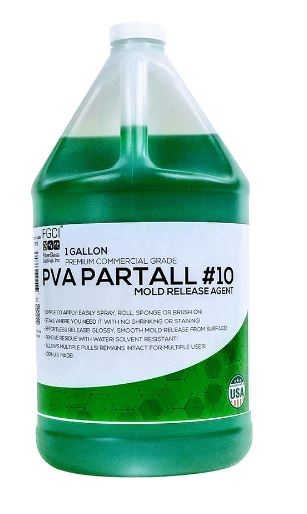
PVA or Partall Film #10 is a release agent that helps with removing parts from a mold or can be used as a surfacing agent when using gelcoat without a wax additive (sanding aid).

PVA is soluble in water making it easy to wash off. Applying can be achieved by spraying or wiping the green liquid on with a sponge. It will foam slightly but dry to a clear, glossy shine. It can take 15-30 minutes depending on temperature.

For spraying gelcoat our FGCI brand does not recommend thinning.

Generally, you should not add more than 10% Styrene by volume. Patch Booster is an additive that will thin out gelcoat and not affect colors. Follow manufacturers instructions as added Mekp may be needed.

Another thinning alternative is the Duratec High Gloss Additive. This is used with gelcoat for many reasons. Mixed at a 50/50 ratio this will produce a high gloss finish and will serve as a thinner for your gelcoat, that is why this is commonly used when spraying gelcoat. In addition, you’ll omit any additional sanding aid. After waiting a full 24 hours you can buff when cured, for a hi-gloss use 600 or higher grit paper and buff with Aqua Buff 2000 compound. Follow the manufacturer’s technical data sheet as an extra hardener may be needed. Some customers use Styrene for thinning but the manufacturer warns it can affect the gelcoat colors although this is the most cost-effective option and doesn’t have the added wax.

What to Use on the Deck of My Boat?

Over the lifetime of any boat there will come a time when the deck needs to be renewed. You have a choice of non-skid additives, or paints that already contain a nonskid compound.  A non skid boat deck helps protect the surface as well as the occupants.

When looking for a non-skid surface you have many options. If your boat floor is currently gelcoat, you can re-gelcoat the surface with or without a non-skid additive. More information about gelcoat application can be found here. Gelcoat is more durable than paint and once a gelcoat surface is painted gelcoat will not adhere.

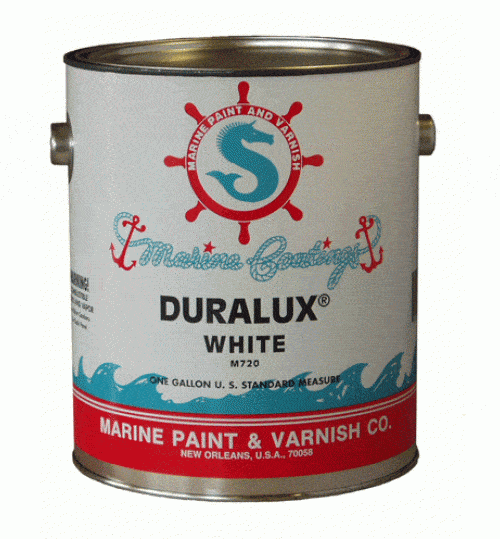
If paint is desired, non-skid can be added to our marine paints by Duralux and Awlgrip. Often an exact match can be found to your hull paint color. Find more topside paint options available and detailed instructions on adding non skid found in our how to section.

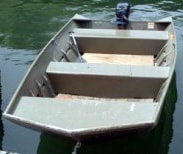
Customers painting the floor of a jon boat, frequently use the Aluma Hawk aluminum paint with a non skid additive. This paint serves as a paint and primer in one for your aluminum surface.

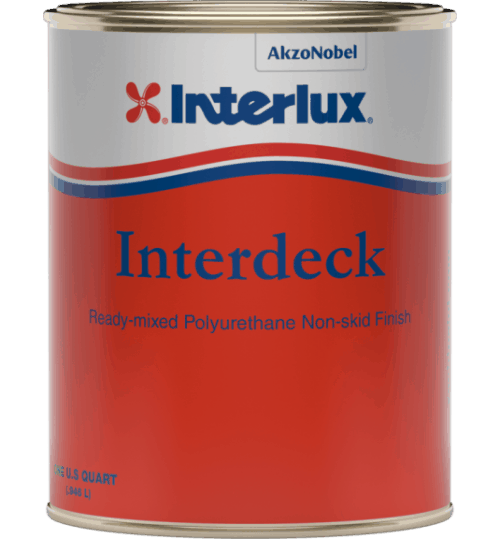
Interdeck boat deck paint is a non-skid deck paint by Interlux and offers an excellent slip resistant finish. It contains a fine aggregate and will apply easily on substrates. Its low sheen finish prevents dazzling that can be reflected by sunlight off decks. Interdeck is also easy to apply and available in numerous colors. The tough polyurethane resin protects decks against everyday wear and tear.

Depending on your paint choices, follow the manufacturers application instructions whether applying to aluminum, fiberglass, or wood to ensure best adhesion and slip resistance.

For cleaning the teak on your boat deck, JustTeak™ is a marine-grade teak cleaning system is designed to rejuvenate your teak quickly and easily. JustTeak™ will clean, brighten, and once sealed protect your teak decking. We have an application instructions video How to clean and protect the teak on your boat.

How To Patch a Hole in a Fiberglass Boat

A fiberglass boat is a great investment. They are durable and can last for years with proper care. But like anything else, they are not indestructible and will eventually need to be repaired. One of the most common repairs is patching a hole in the hull. Fortunately, this is a relatively easy repair that can be done by anyone with basic fiberglass repair skills.

The first step is to clean the area around the hole. This will remove any dirt or debris that could prevent the patch from adhering properly. Next, cut a piece of fiberglass cloth that is slightly larger than the hole. Apply a generous amount of fiberglass resin to the cloth and then place it over the hole. Use a roller or brush to smooth out the cloth and remove any air bubbles. Allow the resin to cure for 24 hours before sanding down the area and painting over it. With a little time and effort, you can have your fiberglass boat looking like new again.

A major fiberglass repair, such as patching a hole, can be a daunting task. Watching a professional do the job can help you get on the right track and be confident in doing the repair yourself. This step-by-step video tutorial produced by Sea Hawk Paints will show exactly what needs to be done when patching a hole in your fiberglass boat.

Note: Before attempting a repair by yourself, get a professional opinion. Always wears Personal Protective Equipment when sanding or working with chemical compounds! Respirator, safety glasses and gloves are always recommended.

Here is a list of products you will need for the repair:

  1. Hawk Epoxy Resin Kit – It contains the epoxy resin, catalyst and filler for the job.
  2. F5 Light Density Filler
  3. Biaxial Fiberglass matting
  4. 50 grit, 80 grit, and 100 grit sandpaper or grinding pads

Hawk Epoxy Video Tutorial

For more information see these other How To Articles:

Filling a Hole in Fiberglass

How Do I Choose Hawk Epoxy Catalyst and Fillers?

How to Mix Hawk Epoxy Resin Properly

Fairing Hull Imperfections


How to Get Strong Hardware Adhesion with Hawk Epoxy

epoxy repair kitWhat is the best way to achieve maximum adhesion when replacing your boat’s hardware? This How To article will give you the basic knowledge you need to get your repair done correctly.
Note: Before attempting a repair by yourself, get a professional opinion. Always wears Personal Protective Equipment when sanding or working with chemical compounds!

Here are some simple steps to follow when bonding hardware to your boat:

  1. Sand both the surface and the hardware to get maximum adhesion.
  2. Wet out the surface with Hawk Epoxy.f2-filler-large-may-2014-150x150
  3. Wait a few minutes for it to soak in.
  4. Wet out the Hardware base with Hawk Epoxy.
  5. Mix another batch of Hawk Epoxy with F2 Structural Adhesive Filler.
  6. Coat the hardware base, screw threads, and surface mount with the epoxy/filler compound.
  7. Tighten hardware bolts until some epoxy mixture squeezes out.
  8. Use your finger to fillet the excess mixture around the hardware base for extra strength.
  9. Before using the hardware, allow the bond to cure overnight.

Hawk Epoxy Video Tutorial

For more information see these other How To Articles:

How Do I Choose Hawk Epoxy Catalyst and Fillers?

How to Mix Hawk Epoxy Resin Properly

Filling a Hole in Fiberglass

Fairing Hull Imperfections

Fairing Hull Imperfections

hawk-epoxy-Large-May-20141What is Fairing?

Fairing is process of smoothing out and restoring the damaged surface of the hull. A fairing compound such as Epoxy resin can be used to fill in divots or gouges and then be sanded to a smooth finish. This restores the surface to its original shape and also prepares it for painting.

Note: Before attempting a repair by yourself, get a professional opinion. Always wears Personal Protective Equipment when sanding or working with chemical compounds!

Here are some guidelines to fairing out imperfections in your hull:

  1. Sand all loose surface debris and hard edges.f5-filler-large-may-2014
  2. Rid surface of debris with clean cloth.
  3. Wet out surface with Hawk Epoxy.
  4. Mix another batch of Hawk Epoxy with F5 Light Density Filler and apply to repair area.
  5. Use long strokes to spread out filler compound over the damaged hull. Apply until the mixture is slightly raised above the hull surface. Make sure the compound extends beyond the repair area.
  6. Let cure 6 hours.
  7. Add skim coat of F5 Filler / Epoxy compound to achieve a very smooth surface. Let cure.
  8. Sand the repair to the desired shape with 80 grit sandpaper.
  9. Finish by applying another 2 or 3 layers of Hawk Epoxy Resin.
  10. The surface is ready to be painted!

Hawk Epoxy Video Tutorial

For more information see these other How To Articles:

How Do I Choose Hawk Epoxy Catalyst and Fillers?

How to Mix Hawk Epoxy Resin Properly

Filling a Hole in Fiberglass

How to Get Strong Hardware Adhesion with Hawk Epoxy


medical kit

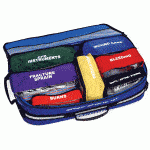
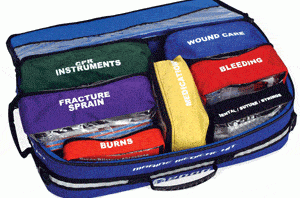
Build an ‘Abandon Ship’ Ditch Bag

Any boat cruising off shore needs an emergency ditch bag for unplanned situations. Being prepared means never assuming that rescue will come before you would need things in a bag, one can never predict circumstances or weather. Having a life raft or kit that comes with your vessel may not have everything you want or need as minimal gear is all that is included so building your own insures your needs are met.

The bag should be water resistant to insure it doesn’t fill immediately with water and sink. Purchase one that is yellow or international orange and you can attach reflector strips for added visibility with a flashlight. A throw bag can be back up as needed.

Clearly label the bag so everyone on board knows what it is keep it in a handy place.

Rescue items can include:

  • Functioning EPIRB (emergency position indication rescue beacon)
  • Handheld VHF radio (in sealed pouch with extra batteries)
  • Flares, water dyes, and/or smoke signals
  • Strobe Light/flashlight
  • Whistle/horn
  • Signal mirror

Survival Items can include:

  • Water (sealed packets better than jug)

    medical kit

    medical kit

  • Food rations (high calorie bars or squeeze packets)
  • First aid kit
  • Extra medications
  • Patch kit for dinghy or life raft/ inflatable repair
  • Knife
  • Matches

Other items depending on space:

  • Handheld GPS
  • Solar blanket
  • Fishing gear
  • Sunscreen
  • Sunglasses
  • Binoculars
  • Life vest/inflatable PFD

Check your bag every season and before a long voyage for charged items and batteries needed. For added information on boat safety, please see the available DVD’s.

Hawk Epoxy System

How do I choose Hawk Epoxy Catalyst and Fillers?

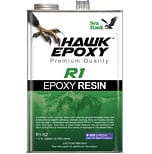
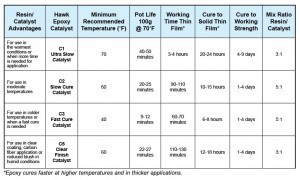
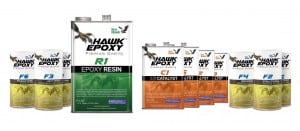
R1 Epoxy Resin – a smooth, low-viscosity liquid epoxy resin. With a variety of Hawk Epoxy Catalysts, it can be cured under a wide range of temperatures and environmental conditions to form a high strength plastic with superior moisture barrier characteristics. Hawk Epoxy repair kit is available in four system sizes color coded on each label. Note: Mix ratios vary by catalyst. For optimal product utilization, be sure to choose the same Size for both the resin and catalyst. I.e Size 1 Resin with Size 1 Catalyst.

ChooseCatalyst

C1 ULTRA SLOW CURE CATALYST: Designed for use with HAWK EPOXY R1 Resin for construction and repairs with superior adhesion, strength, bonding, filling, and moisture barrier qualities at higher temperatures and for an ultra slow cure. Do not use under Sea Hawk marine wood varnish.

C2 SLOW CURE CATALYST: Designed for use with HAWK EPOXY R1 Resin for construction and repairs with superior adhesion, strength, bonding, filling, and moisture barrier qualities at higher temperatures and for a slow cure. Do not use under Sea Hawk marine wood varnish.

C3 FAST CURE CATALYST: Designed for use with HAWK EPOXY R1 Resin for construction and repairs with superior adhesion, strength, bonding, filling, and moisture barrier qualities at cooler temperatures and for a fast cure. Do not use under Sea Hawk marine wood varnish.

C5 CLEAR FINISH CATALYST: Designed  for use with HAWK EPOXY R1 Resin for very clear fiberglass cloth and coating applications with exceptional moisture barrier characteristics. Perfect for natural wood and carbon fiber clear coats with no blush. Longer working times in very warm temperatures. May be used under Sea Hawk marine wood varnish.

TIP* For easy accurate measuring be sure to use the Hawk Epoxy Pumps that are calibrated to dispense the correct amount of resin and catalyst. This is much easier and leave little room for mistakes.

Next choose the best Hawk Epoxy Filler depending on the application:


Choose Hawk Epoxy FIller

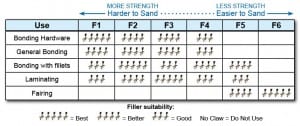
F1 High Load Adhesive Fiber Filler – Thickens to a light grey color creating an easy to use adhesive designed for bonding hardware and other applications with dissimilar materials. This mixture will maximize bond strength for anticipated high loads.

F2 Structural Adhesive Filler – Thickens to an off white color, creating a general purpose thickening additive for bonding, gap filling and filleting. Mix to a workable consistency allowing sag-free and easy flow properties for vertical and overhead applications.

F-3 Light Density Adhesive Micro Fiber Filler – Thickens to an off white color. Great for bonding many substrates, especially wood. The mixture also creates a multipurpose adhesive for many other substrates in addition to providing excellent substrate wetting and penetrating characteristics. Increases impact and abrasion resistance.

F4 Bridging Adhesive Filler – Thickens to a brown color, creating an easy to use adhesive with excellent gap filling and filleting qualities. This mixture blends with many different types of wood to allow for a natural looking fillet or gap fill.

F5 Light Density Fairing Filler – Thickens to a reddish brown color, achieving an easy to sand and carve fairing compound while still remaining strong and light weight.

F6 MicroSphere Fairing Filler – Thickens to a white color, creating a lightweight fairing compound for small to large areas. This product holds a feathered edge very well and is suitable for nearly every substrate. This closed celled structure can also be used for increased acoustic and thermal insulation.

For the easiest way to choose your system, view our Hawk Epoxy Size 1 Kit

Aluminum Hull Repairs and More

jonboatHow to Fix a Leaking Seam or Rivet on Aluminum Boat
As aluminum boats age they show various signs of wear and tear. One of these signs may be a leaking seam or rivet. Over time, rivets can stretched and loosen, causing a gap in the hull integrity and this results in a leak. The solution to this problem is fairly simple and may be fixed at home using just a few tools and know-how. So, how should this problem be addressed?

Locate the Leaking Rivet or Seam

The first step is to find the exact seam or rivet that needs repair. To do this, put the boat in water and observe carefully. You could also put water inside the boat and see where it allows the water to escape from.

Assess the Damage

The second step is assessing the extent of damage to the rivet or seam. If the seam is too wide to be filled or caulked, it will need additional rivets in combination with a sealant product. If the damage is easily visible a sealant or caulk will be sufficient.

Choose a Sealant or Epoxy Product

There are hundreds of products out there that claim to fix leaks and seal cracks. How do you know which to choose? The Bottom Paint Store has done most of the hard work for you and can confidently recommend 2 products that really work.

If your hull is bare aluminum you can cover the entire surface with a high build epoxy primer to help seal and protect it such as Tuff Stuff. For application details see our link for application of a marine epoxy.

Hawk Epoxy KitHawk Epoxy is an excellent product to repair aluminum hulls. We recommend getting one of the Hawk Epoxy Kits that will contain everything you need for filling in the aluminum. Hawk Epoxy is a versatile product that can be used for many other application too. Everyone should own this kit! See video for mixing and selecting fillers.

Another option is G/Flex 650 Epoxy made by West System. This liquid epoxy is more flexible and versatile than regular epoxies and will adhere to almost any surface. The bond that it creates can absorb shock, vibration, expansions and contractions. It will fully cure in 24 hours. Also, West System has created a detailed and comprehensive set of instructions for a wide variety of applications. They can be found at this link and below:

Fix leaking seams and rivets

Patch holes in aluminum hulls

Repair pitted or pin holed surfaces

Now that your leaky rivets and seams have been repaired, you are ready to paint! Check out this How To Article for more information on how to paint your aluminum vessel. Aluma Hawk is a great option or any of our antifouling copper free paint for aluminum.

Boat Blister Repair

Has your boat developed a blister or two? Don’t worry too much! A blister is not a serious issue. Blisters very rarely get so bad that they cannot be repaired. You can even repair them yourself!

Needed materials: Acetone, sanding block, Hawk Epoxy, acid safe disposable brushes.

Hawk Epoxy KitMake sure the blisters are thoroughly drained and grind them deep enough to remove any damaged material beneath the gelcoat. Increase size of ground area as needed until all the laminate around the blister is sound. Clean the entire area and allow it time to dry.
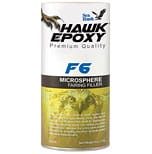
f6-filler-large-may-2014The filler recommended for blister repair is F6 MicroSphere Fairing Filler. F6 MicroSphere Fairing Filler thickens to a white lightweight fairing compound for small to large areas.This creates an easy to sand putty that will help fill in transitions and hull imperfections.  Apply using a putty knife, spatula or trowel. Spread smoothly on the surface in a 1/8″ – 1/4″ layer using heavy hand pressure to displace air bubbles/voids. Try to force the material into holes or joints and smooth to the thickness needed.
Before applying the Hawk Epoxy, the hull must be very dry. Make sure the hull moisture is under 15% by using a moisture meter. Wipe down the entire area with clean rags and acetone. This will remove any remaining contaminants on the hull.

Hawk Epoxy is a low viscosity epoxy system that makes fiberglass repair easy for everyone! Equipped with a wide variety of Catalysts and fillers, you can mix up the exact epoxy batch needed for almost any job. For more information on how to mix Hawk Epoxy, click this link. Mix only enough Hawk Epoxy to use in 5-10 minutes. Apply the Hawk Epoxy to the hull using the Roll and Tip method. Use a roller to apply the epoxy and then use the tip of a high quality brush to smooth the epoxy evenly. The roller should be lint free and non-wicking. Any fibers that get in to the epoxy could compromise the integrity of the seal.

Apply the second coat when the first coat is tacky to the touch. Your finger should leave an imprint but not lift any of the epoxy coating. Allow the second coat to dry fully. Once it is completely cured, wash the repaired area with soap and water. The repair is now ready to be sanded and painted with Sea Hawk bottom paint. If redoing the hull apply Tuff Stuff primer, followed by bottom paint.

If the blister has damaged the fiberglass, that will need to be repaired with fiberglass cloth cut to match damaged area.

The video below is from Sea Hawk Paints and demonstrates how to seal a fiberglass hull using the Hawk Epoxy System.

How to Repair a Gelcoat Scratch, Cracks or Hole

When looking at a scratch in the gelcoat, you need to determine whether it is a surface scratch or a deep scratch. The reason being is that surface scratches can easily be buffed with a rubbing compound as opposed to deep scratches which take a couple more steps. As long as the gelcoat around the deep scratch is in good condition, you will be able to use gelcoat putty , requires mixing MEKP catalyst-once mixed properly it can be worked with a putty knife for filling, or you can make one using gelcoat and an aerosil filler/thickener. Once the filler is applied, the service will be uneven so sanding and polishing will be necessary. Customers report wet sanding with 2000 grit worked well. Everything about the repair of the scratch is fairly easy to do.

For deeper gouges, you will need to purchase gelcoat in various colors. Tints are available as well if custom matching larger quantities of gelcoat or paste. The kit will contain everything you need to do the job including some tints for matching. Some find the gouge needs to be scraped deeper with a screwdriver or Dremel tool to open it into a wide V to make sure the gelcoat has a place to settle and more permanent.  If you simply cover the cracks they may continue to spread. The  gelcoat that exists on the boat is already bonded with the laminates that are underneath. That being said, you will have to rough the surface up a bit with sand paper in order to give the paste something to stick to. Please note that you need to clean the surface with acetone after sanding to clean any contaminates off that may interfere with the filling process.

When the damage is a larger (like a screw hole) you made need 3M’s Preminum Marine Filler or 3M Marine High Strength Repair Filler. These are for bonding and filling repairs above or below the waterline and can be sanded. Some customers prefer to mix some thickener (cabosil) and gelcoat to a thick consistency. Both of these products can be applied with a spreader. If coating over with gelcoat be sure to leave space (about 1/8 inch) for the gelcoat. Splash Zone epoxy is easy to use for large areas underwater for all substrates.

For puncture holes through the gelcoat or several holes have been drilled through and need filling you can also consider using the Hawk Epoxy System. See information on how to choose the Hawk Epoxy kit.  

If the underlying problem for the hairline cracks is not handled, re-gelcoating over them will only be a temporary fix, such as a soggy core or broken support. The cracking has stemmed from a crack below the gelcoat and in the fiberglass. This is one option to repair those cracks:

  1. Using a Dremel tool, remove the gelcoat on either edge of the crack, all the way down its length. Basically this widens the gap and reveals the fiberglass layer beneath.
  2. Determine if there is a crack in the fiberglass. If there is, it needs to be filled with a putty containing fiberglass strands. Duraglas Fiberglass Filler is one option.
  3. Apply Gelcoat to the area. Can be brushed, rolled, or spray applied.

Once you have the gelcoat mixed, saving the hardener for last, begin to spread over the gouge with a plastic spreader. Since the paste will shrink slightly as it dries, make sure you put a little extra paste on the “wound”. A slight bulge will be ideal after the paste is applied. As the paste will not cure completely in the air, you will need to put a plastic film over it. If your kit does not have one, shrink wrap or wax paper will work. Tape the plastic/wax paper on all sides over the paste and let dry for 24 hours.

After the 24 hours are up, remove the plastic/wax paper. Take a piece of 400 grit sandpaper accompanied with a 3M sanding block and begin to level any areas that are raised and uneven. It will help if you have a bucket of water or water hose handy to wash away the excess material as you sand. Once you have completed the sanding with the 400 grit, you will need to now use a 600 grit sandpaper to go over the repair. The reason this is being done is to eliminate any scratches the 400 grit may have put in the repair and smooth it even more. You will continue this process moving up to a 800 grit and then a 1200 grit. Occasionally you will want to dry the repair area just to get an idea of the work you have done so far.  At this point you can wax and buff the repair.

Removing Stains from Gelcoat

A gelcoat surface is a very smooth, mirror-like finish when it is new. As gelcoat ages, it becomes porous which means the more easily it stains, the worse it looks and the harder it is to clean. Most all gelcoat can be restored, providing it is not completely worn through. Exhaust stains, like diesel, can develop on the surface of the Gel Coat. These stains can set in on the wax surface of the gel coat but the right cleaner can remove them. If the stain goes deeper, a bit of elbow grease will be needed.

Clean and inspect the surface with a wash with a mild cleaner like 3M’s boat soap or some alternative stronger cleaners if needed. After cleaning, dry and inspect surface for needs to be addressed: scratches, dings, cracking and crazing and to fix these flaws before rubbing out the gelcoat and restoring its shine. See the fiberglass/gelcoat repair section for options and the West System Video for “how to” instruction.

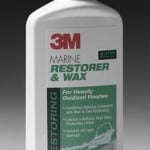
Apply a fiberglass stain remover, like 3M Fiberglass Restorer and Wax , Mothers Marine Black Streak Remover, or 3M Marine Cleaner and Wax to the stained gelcoat area with a clean rag. The black/gray stains are the result of soot being deposited on your hull. It can happen when wet exhaust systems mix the exhaust gases with seawater and discharge those gases or dry exhaust systems discharging the soot directly into the atmosphere and it lands on your boat.

These liquid one-step products that combine a polish or compound with a wax remove oxidation, and protect the gelcoat in one step.

Wait 10-15 minutes. If the stain is simply laying on the surface of the Gel Coat, the stain will begin to loosen; rinse and inspect the results.

If the stain is lifting, repeat. If not, then something stronger like a more abrasive compound with a polisher may be needed; in that case a wax will be needed to restore the shine. Each time compound products are used, some of the gelcoat is removed. Use caution to use the least aggressive product that will get the job done. Frequently all that may be needed is to apply a protective coating of wax, such as 3M Ultra Performance WaxScotchgard Marine Wax, or Mothers Marine Synthetic Wax to help keep that shine.

For more gelcoat restoration tips see our how to Maintain and Restore Gelcoat link and Aqua Buff information.

How to Clean, Restore, and Seal Teak Wood on Your Boat

Just Teak Restoration KitsTeak wood is an excellent material for boat decks, furniture, and trim. However, to keep it in good condition and enhance its beauty, it needs regular maintenance. Applying teak oil is one of the best ways to protect teak wood from drying out, fading, and

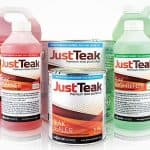
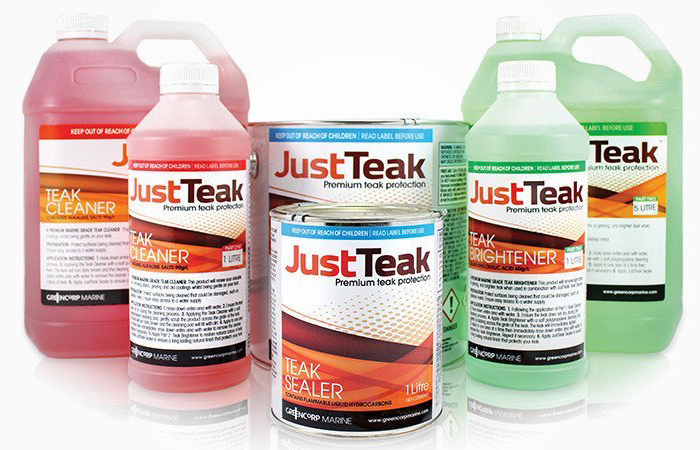
Restoring your weathered teak wood is an easy 3 step process using the  JustTeak™ Teak Restoration Kits. Learn how to clean, brighten, and seal your teak or other wood. This simple teak restoration process can be used on an teak wood including teak furniture and teak decking.

Step 1 (Part 1). Cleaning Teak Wood with the JustTeak™ Teak Cleaner
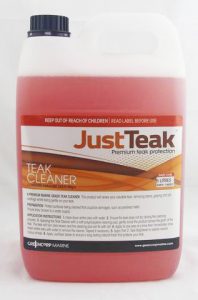
 JustTeak™ Teak CleanerGetting the teak clean is the first step in the process. You need a really effective cleaner that will not harm the wood. You should not use any bleach. All weathered teak should be first be cleaned with JustTeak™ Teak Cleaner.

1. Hose down entire areas thoroughly with fresh water. Ensure the teak does not dry during the cleaning process.
2. Applying the JustTeak™ Teak Cleaner with a soft polypropylene cleaning pad, gently scrub the product across the grain of the teak. The teak will tum dark brown and the cleaning pad will fill with dirt.
4. Apply to one area at a time then immediately rinse down entire area with water to remove the cleaner. Repeat if necessary. 


Step 2. (Part 2) Using  JustTeak™ Teak Brightener
on Your Teak Deck

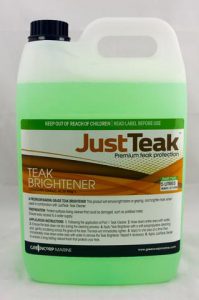
Just Teak Teak Brightener JustTeak™ Teak Brightener is the answer to dull, gray teak. Specifically designed to restore light beautiful look of new teaks.
– Brightens Teak Dulled by Weather and Wear
– Won’t Raise the Grain
– Contains No Bleach
– Cleans Away Discoloration in the Deck

1. Following the application of Part 1: JustTeak™ Teak Cleaner.
2. Hose down entire area with water.
3. Ensure the teak does not dry during the cleaning process.
4. Apply JustTeak™ Teak Brightener  with a soft polypropylene cleaning pad, gently scrubbing across the grain of the teak. The teak will immediate lighten.
5. Apply to one area at a time then immediately rinse down entire area with water to remove the Teak Brightener. Repeat if necessary.


Step 3. Application of JustTeakTeak Sealer

JustTeak Teak SealerJustTeak™ Teak Oil Sealer is designed to seal and protect teak. Restores and protects teak and other woods. Easy to use and extra long lasting formula.
– Easy to Use
– Extra Long Lasting
– Restores and Protects Teaks and Other Woods
– Adds Luster and Beauty to Your Deck

1. For best results apply in temperatures above 10°C (50°F) on a sunny, low humidity day, ensuring the teak is dry. Shake vigorously prior to use. This product must be shaken periodically whilst using to ensure even colouring. Make sure the surface is completely dry prior to application.
2. Apply the JustTeak™ Teak Oil Sealer by either brush, pad applicator or rag. Take note to apply sealer along the length of the board to ensure even coating and avoid line marks.
3. Apply generously. Allow to dry, soak up any areas that may have not absorbed the sealer. When touch dry, apply 1-2 subsequent coats until the teak stops absorbing the sealer.
LOOKING AFTER YOUR SEALED TEAK Over time the sealer will start to lose its lustre and water beading capability. A fresh coat of JustTeak: Teak Sealer should be applied to restore the finish. For best results remove the Teak Sealer with JustTeak Cleaner and Brightener and re-apply.

Applying teak oil is a simple and effective way to maintain the beauty and longevity of your boat’s teak wood. Just follow these simple steps and you can ensure that your teak wood surfaces remain protected, shiny, and smooth. Regular maintenance will prevent the wood from drying out, fading, or cracking, and keep your boat looking its best for years to come. So, go ahead and try it out – your teak wood will thank you!

The the best value, choose from our Teak Restorations Kits that include the Teak Cleaner, Teak Brightener, and Teak Sealer for the best Savings!

Just Teak Restoration Kits

Maintaining and Restoring Your Gelcoat

As you haul your boat out of storage you may want to get the gelcoat shining once again.
Use the steps below as needed:

New Boats

Which Products To Use:
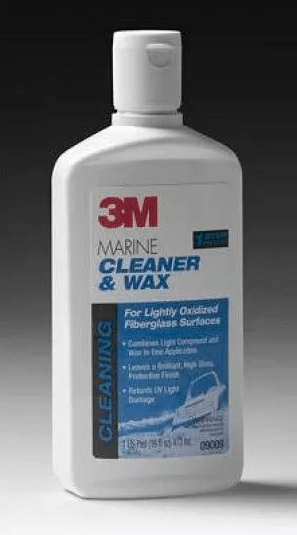
If your boat is new and the finish is still in good condition with little to no oxidation, you can use a one-step clean-and-wax product that combines washing and waxing in one step. We recommend using the 3M Marine Cleaner and Wax.

If your boat has light gelcoat oxidation use the least aggressive method, if possible, to prolong the life of gelcoat. We recommend cleaning with marine boat soap and buffing with the 3M Imperial Compound. Avoid direct sunlight and room temperature is best for application.

Note: An easy way to determine if gelcoat is oxidized is by wiping your hand across the surface. If any chalk wipes off on your hand, the gelcoat is oxidized and you will need to wash and buff the surface before polishing.

Follow these three simple steps to polish your gelcoat:

Step 1: Once you know which polish to use we recommend using a high-quality microfiber towel to apply the product. Avoid low-quality towels because they will shed fibers and leave streaks and residue on the boat.

Step 2: Wet the microfiber rag, remove any excess and apply a tablespoon of polish to the rag. This amount of polish will work for a few square feet. Remember, you want to work in small areas in order to cover the entire surface correctly.

Before buffing, spread the polish evenly across the boat’s gelcoat. You will get the best results when working the polish into the surface with circular motions.

Step 3: Once the polish dries into a haze you can remove it with a clean dry rag. Make sure you get in all the nooks and cracks for a smooth beautiful finish.

Older Boats


If your boat has been in contact with the elements over long periods of time (10-15 years), the process of restoring the appearance of the gelcoat will take some additional steps.

Step 1: Clean the surface. For boats that need a more aggressive cleaning just wash the surface and remove any loose contaminants. You can use a non-abrasive light detergent (marine boat soap) to remove all surface dirt and all previously applied coatings.
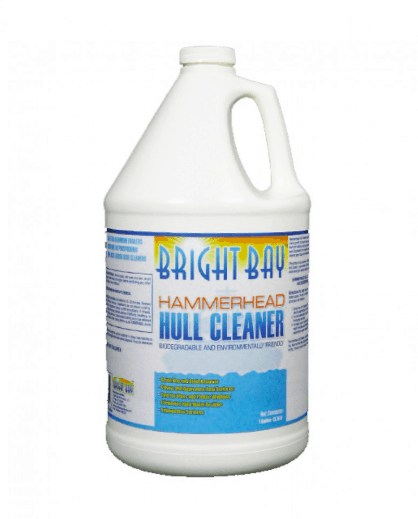
If you need something stronger to remove surface rust, oil, tar, algae discoloration, black streaks caused from water runoff, exhaust and waterline scum, or other stains we recommend using an acid-based stain remover like Hammerhead Hull Cleaner. It is important to completely remove all stains before waxing, or you’ll seal in the stain.

Step 2: Select your compound. If your boat is a bit more oxidized a rubbing compound (liquid abrasive which “sands” your hull) is needed, but do so carefully as you can run through the gelcoat. The more faded your hull the more compounding you’ll need. The 3M Imperial Compound usually applied with a polisher if possible and compatible 3M pads, like the white 100% wool pad, recommended by 3M. Keep product off bottom paint, if applicable, by taping off as it can spatter. If the compound isn’t strong enough for your level of oxidation and scratches, then you may need to “pretreat” with a 1200 (or 800) grit as needed prior to the compound.

Note: When buffing, you should work on small sections of the hull (3-5ft sections is recommended). It is important to keep the wool pad damp. If you notice the pad is dry and the wool looks ‘matted’ after working the material into one area, just rake the wool back into form with a pad spur and re-wet the pad to continue with the application.

Step 3: Polish the surface. We offer the 3M Finesse-It II or Aqua buff 1000, to help provide a nice finish to the gelcoat after compounding and bring it to a gloss. Apply with the yellow pad by 3M.

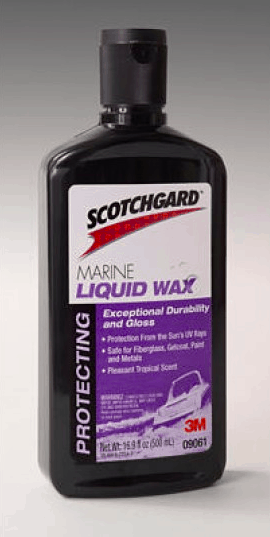
Step 4: Wax to seal. The last step is a wax coat such as Scotchguard Marine Liquid Wax or 3M Ultra Performance wax. These helps to seal and protect all the work you’ve just completed.

Gelcoat vs Topcoat

Gelcoat is a type of resin that is applied to the hull of a boat in order to give it a smooth, glossy finish. In addition to its aesthetic appeal, gelcoat also helps to protect the hull from UV damage and tough weather conditions. While gelcoat is typically clear, it can also be tinted to a color to give the boat a unique look.

Topcoat is applied above the waterline only and is typically a polyester based high gloss polyurethane that provides long lasting gloss and color retention. Topcoat is available in both clear and colored varieties, and it can also be glossy or matte finish.