
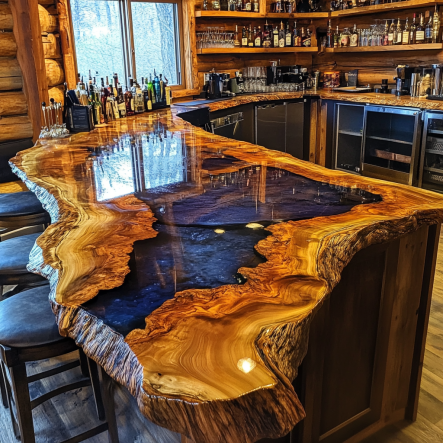
How to Epoxy Resin a Bar Top: A Guide to Turning Your Bar Top into a Showstopper
Whether you’re a DIY enthusiast or just someone who refuses to pay for something you could probably do yourself, coating a bar top in epoxy resin is one of the most rewarding home projects out there. With the right steps and a little patience, you’ll transform your bar from “functional” to “wow, is this granite?!” (No, but it’ll look that good). Let’s walk you through it—from prepping the surface to pouring that final glossy layer.
Step 1: Gather Your Supplies
Before we dive into the resin (not literally, though that would make for a great YouTube video), let’s talk supplies. Here’s what you’ll need for this sticky yet satisfying adventure:
Bar top epoxy resin is a popular choice for creating clear, hard, and durable surfaces, often found on commercial bar tops and restaurant tables.
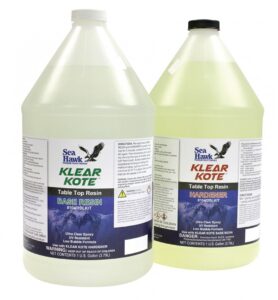
Epoxy resin: Make sure you get a good quality, clear epoxy resin designed for countertops or bar tops.
Measuring cups: You’ll need these to mix the resin and hardener in the correct ratios.
A stir stick: For mixing. We’ll explain more on the mixing process in a bit (hint: it involves a lot of stirring).
Painter’s tape: You’ll use this to create barriers around the edges of the bar, so the epoxy doesn’t dribble off like syrup on a pancake.
Sandpaper: For smoothing out any imperfections in the bar top surface before applying the epoxy.
Gloves and protective gear: Epoxy resin doesn’t come out of clothes easily, and your hands will thank you later.
A heat gun or propane torch: This will be used to remove air bubbles from the epoxy surface once it’s poured.
Drop cloths: Things will get messy. Trust me, you’ll want these.
Now that you’ve got your arsenal ready, let’s prepare that bar top!
Step 2: Prep the Surface Like a Pro
The key to a smooth, beautiful bar top lies in the prep work. Epoxy resin will show every little flaw, so it’s crucial to start with a clean, smooth surface. If you’re working with an older bar or a wooden surface, you’ll want to sand it down using fine-grit sandpaper (220 grit works well). This removes any old finishes, stains, or rough patches. Give it a wipe with a damp cloth to remove all the dust afterward.
Pro tip: Use painter’s tape to cover any areas where you don’t want the resin to go. Also, make sure your bar top is perfectly level—epoxy resin is a bit of a diva and will flow downhill if given the chance.
Step 3: Mix It Up
Now comes the moment of truth—mixing the epoxy resin. Most resins come with a two-part system: resin and hardener. These need to be mixed in the exact ratios specified by the manufacturer, usually 1:1 or 2:1.
Step-by-step mixing instructions:
Pour the resin into one measuring cup.
Pour the hardener into another.
Combine them in a larger container and stir like you’ve never stirred before. Keep mixing for at least 3-5 minutes to ensure they’re fully combined. Don’t rush this step; if the resin isn’t mixed properly, it won’t cure correctly, and you’ll be stuck with a sticky mess.
Pro tip: Scrape the sides and bottom of the container as you stir to avoid any unmixed resin or hardener clumps.
Step 4: The Pour
This is where things get exciting (and potentially very sticky). Once your resin is fully mixed, it’s time to pour it over the bar top. Start by pouring in the center and allow the resin to spread outward. Use a foam brush or plastic spreader to help guide it evenly across the surface.
Don’t worry too much if it looks a bit uneven at first; the resin will self-level over time. Your main job is to make sure it covers every square inch of the bar top.
Step 5: Banish Those Bubbles
One thing about epoxy resin: it loves bubbles, but we don’t. After pouring, you’ll notice tiny bubbles rising to the surface. This is where your heat gun or propane torch comes into play. Pass it gently over the surface, just a few inches above, and watch as the bubbles disappear like magic. Be careful not to linger too long in one spot, though—you’re trying to pop bubbles, not cook dinner.
Step 6: Let It Cure
Now comes the hardest part: waiting. Depending on the type of epoxy resin you’re using, curing time can take anywhere from 24 to 72 hours. During this period, keep the bar top covered to prevent dust, bugs, or curious pets from getting into the wet resin.
Step 7: Apply Additional Coats (If Necessary)
Once the first coat has cured, you may want to apply additional layers for added depth and durability. If you’re satisfied with the first coat, congratulations! You’re done! If you want that extra-thick, glass-like finish, repeat the mixing and pouring process until you’ve achieved your desired thickness.
Step 8: Enjoy Your Handiwork!
As your friends admire your new, super-glossy bar top pat yourself on the back, pour yourself a cold one, and bask in the glory of a job well done. Not only have you saved a ton of money by doing it yourself, but you’ve also added a touch of craftsmanship that’s guaranteed to impress anyone who visits.
Ready to Protect Your Bar Top?
Now that you know the ropes, it’s time to get started and create that high-gloss magazine look or at least keep your surface spill-proof. If you need any assistance selecting a good bar top epoxy resin you can always call the Bottom Paint Store customer support team 888-505-2313.