
If you’re thinking about painting your outdrive—the stern drive of your boat, you want to save it from the merciless ravages of corrosion and wear. In this post we’ll share some insights to help you paint it like a pro.
Preparation is Key
Clean Thoroughly: Begin by thoroughly cleaning the outdrive to remove any salt residue, dirt, and grime. A pressure washer can be useful here, followed by hand scrubbing with a degreaser and marine cleaner. Make sure the surface is completely clean and dry before proceeding.
Sand the Surface: Sanding is crucial for ensuring that the new paint adheres properly. Use medium-grit sandpaper to sand the entire outdrive. This roughens up the surface and removes any flaking paint or rust. Be sure to wipe down the area after sanding to remove all dust.
Apply Primer
Choose the Right Primer: Select a primer that is specifically designed for marine use and compatible with the type of paint you will be using. Epoxy primers are a good choice for their durability and corrosion resistance.
Apply Evenly: Use a spray gun or brush to apply the primer. Make sure to cover all areas evenly, including hard-to-reach spots. Allow the primer to dry completely, according to the manufacturer’s instructions.
Painting
Select High-Quality Marine Paint: Choose a paint that is suitable for marine environments, particularly those formulated for metal surfaces underwater. Antifouling paint is recommended to prevent the growth of barnacles and algae.
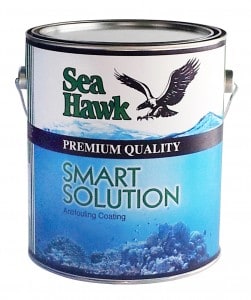
Smart Solution Outdrive Paint is the next generation in antifouling technology and is engineered to be the most effective environmentally friendly antifoulant available for outdrives.
Smart Solution from Sea Hawk Paints is an excellent option. When Smart Solution interacts with water upon launching, it forms a slick layer around the outdrive. This layer not only boosts speed but also delivers top-notch performance by preventing biological buildup.
Multiple Thin Coats: It is better to apply several thin coats than one thick coat. Thin coats dry faster and adhere better, reducing the risk of drips or sags. Allow each coat to dry fully before applying the next.
Finishing Touches
Clear Coat Application: Applying a clear coat after the paint can enhance durability and gloss. This step is optional but recommended for an extra layer of protection against the elements.
Cure Time: Allow ample time for the paint to cure fully before launching the boat back into the water. This can take anywhere from a few days to a week, depending on the paint and weather conditions.
Safety
Personal Protective Equipment: Always wear appropriate safety gear, including gloves, goggles, and a respirator, to protect against harmful chemicals and fumes.
Environmental Considerations: Use paints and solvents that are compliant with local environmental regulations. Be mindful of overspray and runoff during the painting process.
Regular Maintenance
Inspect Regularly: Regular inspections can help catch issues before they require a major repaint. Look for chips, cracks, or signs of wear and touch them up as needed to prolong the life of the paint job.
Aluminum Outdrives
If you are working with an aluminum outdrive, ensure that any product you use is compatible with aluminum to prevent adverse chemical reactions.
Consider the temperature and humidity of your working environment, as these can affect drying times and the finish of the paint.
There you have it, by following these steps and painting your outdrive correctly you can ensure a successful result, extending its lifespan and maintaining its performance. If you need any assistance selecting the right outdrive paint for your needs, feel free to contact the customer support team at Bottom Paint Store 888-505-2313.